ROOFING
MATERIALS
Each
package of shingle
material includes starter strip for the first course and pre-scribed
roof peak
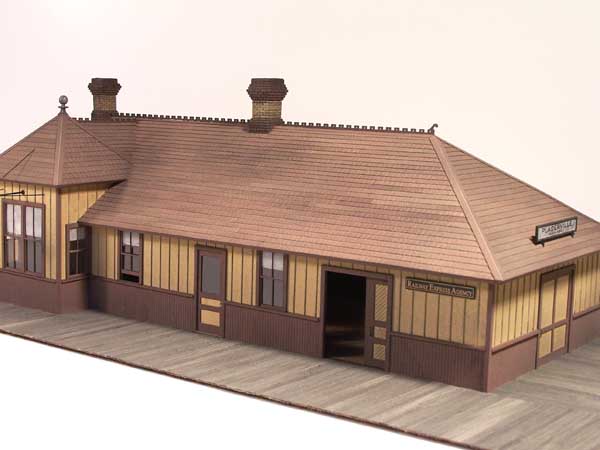
cap for the finishing touch. The above photo shows our O-scale
Placerville Depot with the shake shingles applied.
The photo,
below, illustrates our O-scale diamond pattern shingles.
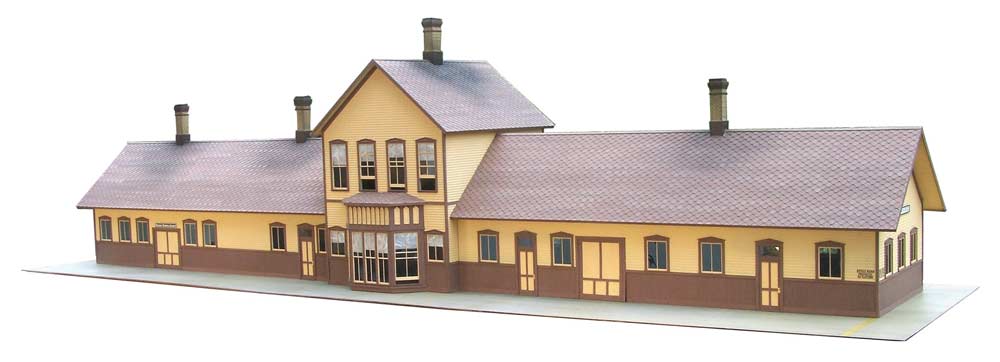
DURANGO
DEPOT,
O-SCALE, DIAMOND SHINGLES
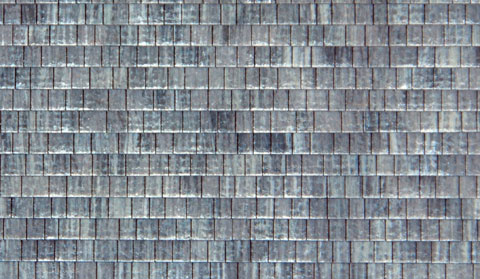
The
shake shingles are randomly spaced horizontally but are aligned evenly
along
the bottom (our prototype builders weren't into the "caricature"
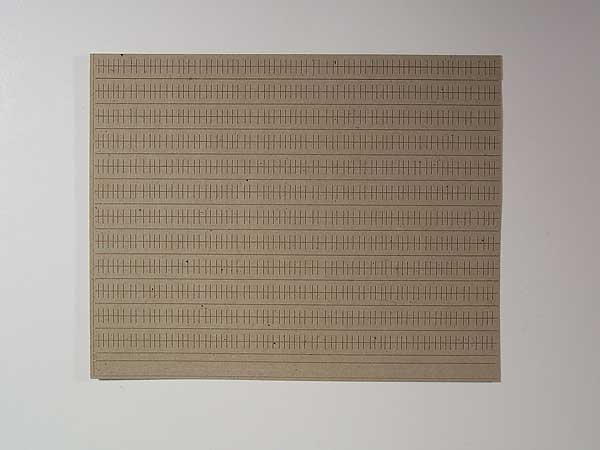
look!). The 3-tab (also known as "composition") shingles are
typical of "asphalt" shingles. The shingle notches are spaced
12-inches apart and, again, are even on the bottom. The diamond
style is
also a composition or asphalt shingle that has been used on structures
since
the early 1930s. The prototype diamond shingles tabbed into each
other
along the
bottom edge, making them more durable in windy locations.
Apply the shingles to your structure, taking them from different sheets and different areas of the sheets to further produce the randomness of the colors. Once the roof is shingled, apply a fine overspray of your "base" color to blend the shades together, and finish with another light and uneven coating of Engine Black to simulate soot in different areas of the roof.
To finish our Diamond and 3-tab shingles (asphalt-types), I suggest starting with Floquil's Primer or some other gray color, followed by a heavier coating of your "base" color. (Asphalt shingles start with stronger, richer colors, but they tend to wear and fade, allowing the tar-paper base to eventually show through. The weathered tar paper will often appear more of a gray or very weathered black color.) Don't use the Old Silver as with the shake shingles, but add a bit of Earth (for dust/dirt), as well as the Engine Black for soot.
First, spray all the sheets with Tamiya gray primer. After it is completely dry, using a 1/4" wide wash brush (Wash brushes usually have “wash” printed on the handle) randomly paint/streak Floquil Roof Brown on each sheet until about 70% to 80% of the primer is covered. Be careful not to flood paint onto the paper shingles. Vary the pressure some, as well as the speed, to create variations in coverage. Brush this, and all following colors, aligned with the shingles, not in line with the rows on the sheet. Once this has dried completely, use Floquil Rail Brown and paint all the areas not previously colored by the Roof Brown. Closely examine the shingle sheets and paint in every tiny area where you even THINK the Tamiya primer can be seen. This blends a good portion of the two browns together and lightens the overall tone. Let this dry overnight. Next, use Floquil Earth, and turning the brush sideways to apply it, add light streaks over areas randomly, covering about 8% to 12% of each sheet. Vary the application so some areas are almost dry brushed, while others were simply painted. Occasionally scrub the color into some areas. After a few hours drying time apply Floquil Mud with the same technique. When this has dried, come back and lightly brush any lightly painted areas you think are too light using Floquil Roof Brown. Also randomly add some dark accents, but never blot any paint onto the shingles. Always keep the brush going in the direction the shingles are cut. Apply the shingles selecting random strips from random sheets to further enhance the variation in tone & color. If the variations are too pronounced for your taste after they are applied, apply washes over the shingles.
There
are many other colors that can be
used or combined to produce any type of appearance you want. Don’t feel
as
though the ones shown above are best: They are only examples. For a
lighter
appearance, try using colors such as Grime, SP Lettering Gray, Mud,
Foundation,
Aged Concrete, Sand, Earth, etc.
Still not impressed? Ken's continued to experiment and has a
second "brush" method you may want to try:
First, spray the sheet with gray primer. I used Krylon brand primer I found at a craft store. After it is dry, using a 1/4" wide wash brush held "sideways" (Wash brushes usually have "wash" printed on the handle) randomly paint/streak Floquil SP Lark Dark Gray onto the sheet until about 15% to 20% of the primer is covered. Be careful not to flood paint onto the paper shingles. Vary the pressure some, as well as the speed, to create some variation in coverage. Brush this, and all following colors, aligned with the shingles, not in line with the rows on the sheet. Next, use Floquil Reefer Gray and paint over another 25% to 30% or so of the primer. You don´t need to pay too much attention to NOT covering the previous color, but try mainly to paint over the primer. Where the brushed colors overlap they will blend together somewhat, and that is okay. Now brush on Floquil SP Lettering Gray, covering another 25% to 30%. Lastly, brush on some Floquil Grime to cover another 15 to 20% of the area. At this point about 80% to 90% of the primer, maybe more, will be covered and the shingles will resemble a sheet of laminated wood paneling from the 1960s, but grayish instead of brown. On a warm day, If you allow about 20 minutes for the primer to dry and 25 for the brushed paint, you will have completed the shingle sheet in about an hour. When you apply the shingles, select random strips from the sheet to enhance the variation in tone & color. Dry brush with some white to bring out detail after you're done.
HO SHAKE SHINGLES
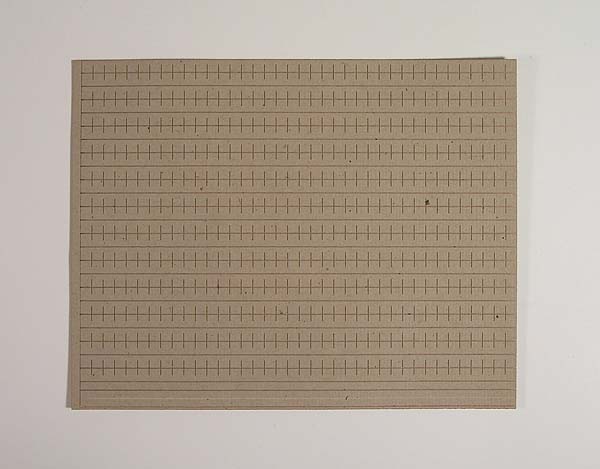
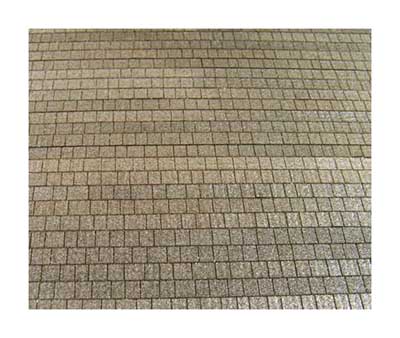
HO 3-TAB (COMPOSITION) SHINGLES
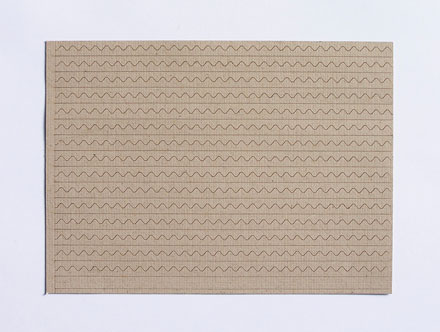
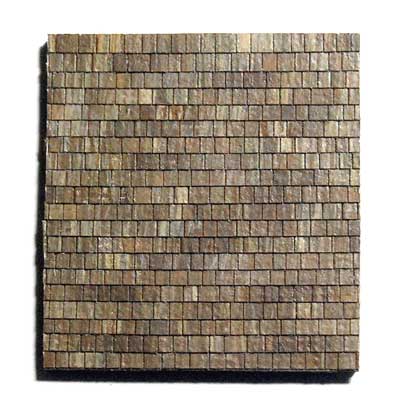
HO
DIAMOND (COMPOSITION)
SHINGLES