(CLICK HERE FOR THE LATEST UPDATES: 03-24-26)
This is a web page presenting the monstrosity in my basement: my Sn3 version of the Rio Grande Southern Railroad. Eventually, I hope to spend more time organizing and adding the information most modelers include on web sites dedicated to their railroads. But we all know that life often interferes with our plans, so I'm making no promises....
LOWER TRACK: RIDGWAY TO DALLAS DIVIDE; UPPER TRACK: DOLORES TO RICO
A BIT OF BACKGROUND:
I moved to Pennsylvania from Colorado way back in 1979 and immediately started building a home. A very high priority was to have a home with a basement large enough to fit an Sn3 version of the Rio Grande Southern Railroad -- a 162 mile, 3-foot (narrow gauge) line that operated in southwestern Colorado from 1891 until 1951...mostly in Receivership (BROKE!). There are lots of other web pages dedicated to the intriguing history of the little road, but for now I'll leave you to find them.
The basement that resulted is very odd shaped (a drawing to come, perhaps?). It measures roughly 30 x 40-feet with three "extensions" or alcoves of 9 x 10-feet, 9 x 12-feet, and, 14 x 16-feet. It's a good amount of space...until you want to fit a 162-mile long railroad into it. Unfortunately, the basement has a house just as large above it which has taken far longer to build than I expected. In fact, it's not really 100% finished to this day.
Construction of the railroad began in 1993 but progress has been slow due to life's many other little interferences such as having to make a living.
TRACKPLAN:
YES, it's finally DONE!!! I've drawn the track plan in a form where you just MIGHT understand it! Unrealistic? Outrageous? Ridiculous? Yes, all of that and more. But I'm still enjoying it! Click the link to see it, and be prepared that the download may not be as fast as you'd like!
PHOTOS:
In order of importance:
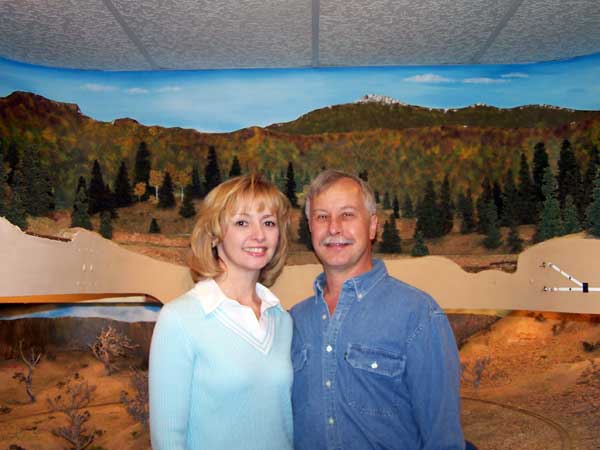
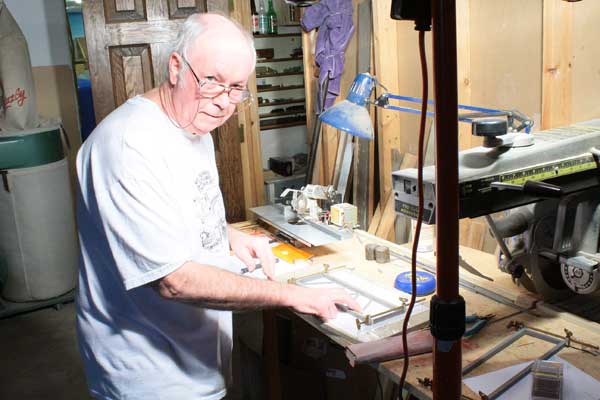
LORI AND MYSELF (A FEW YEARS AGO). I'M VERY LUCKY TO HAVE SUCH AN UNDERSTANDING WIFE!!
In no particular order:
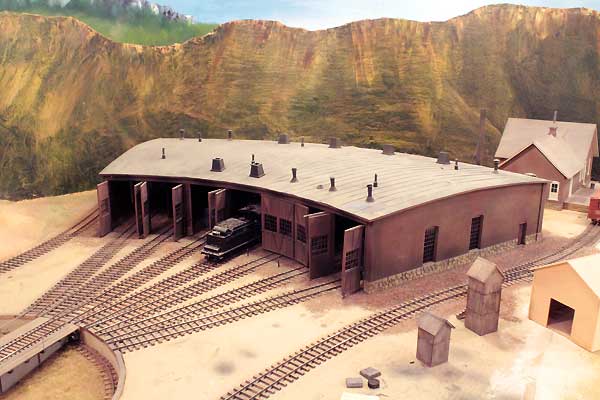
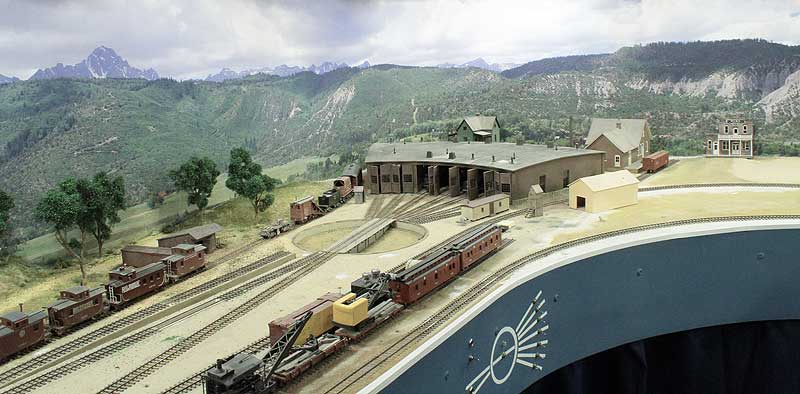
RIDGWAY ROUNDHOUSE AND RGS OFFICE (BOTH SCRATCHBUILT)
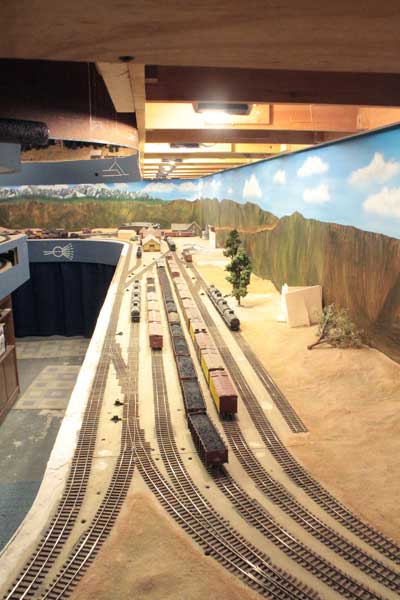
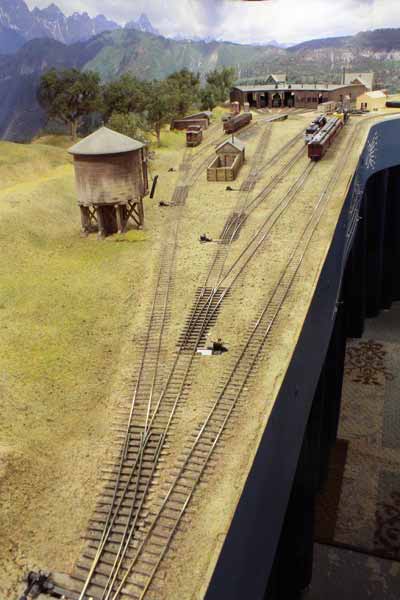
RIDGWAY YARD
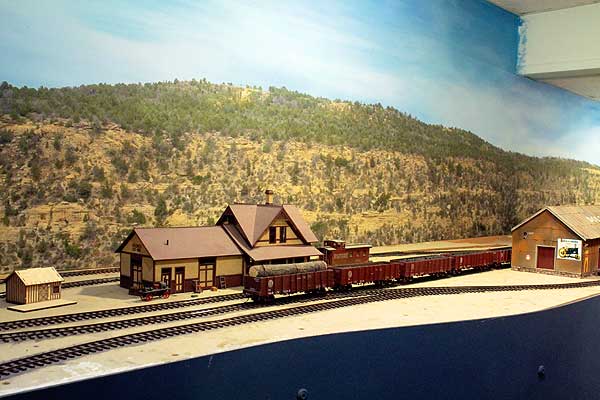
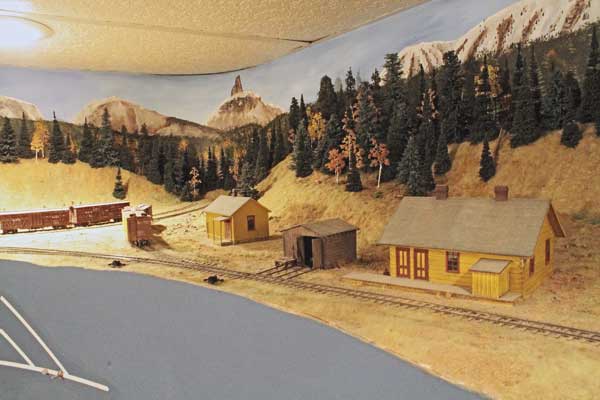
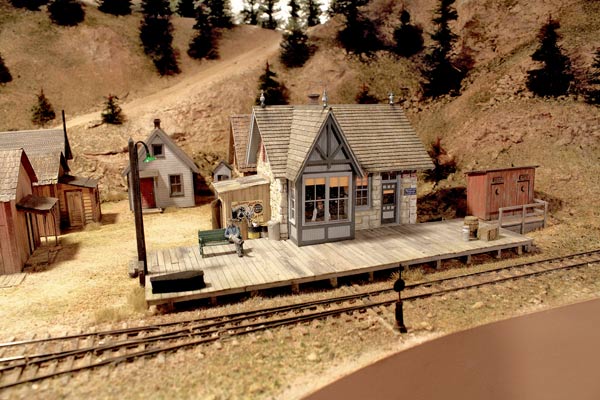
DOLORES (THAT'S THE ORIGINAL DEPOT I DESIGNED FOR BANTA)
THE BACKDROP IS BY MY FRIEND, DALE KREUTZER
MONTEZUMA FRUIT CO, (ART FAHIE'S SCENICING WORK!) (A KIT I DESIGNED FOR BANTA BUT WAS NEVER PRODUCED)
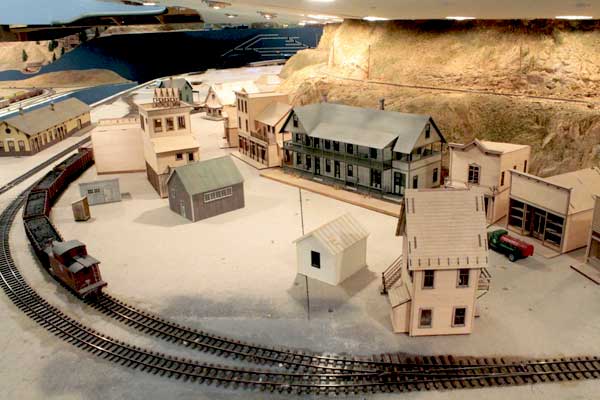
TOWN OF SILVERTON "MOCKUP" (LOTS OF "TEST BUILDS" IN PLACE OF FINAL STRUCTURES)
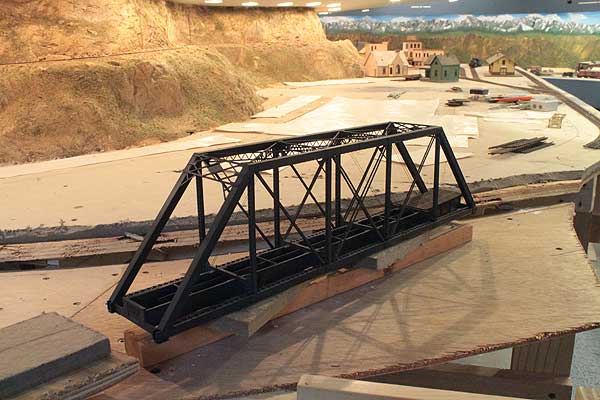
CURRENT PROJECT -- BRIDGE OVER LOS ANIMAS TO SILVERTON (A MODIFIED CENTRAL VALLEY KIT)
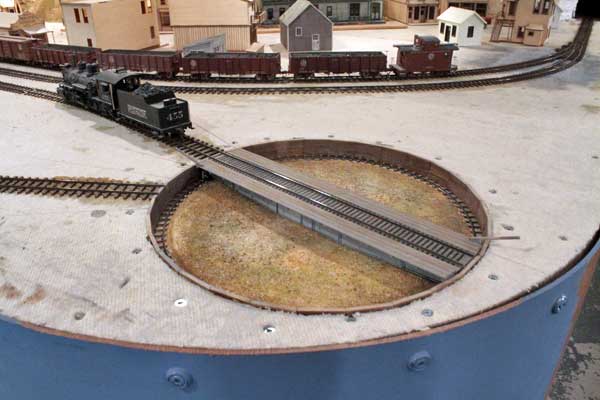
LATEST PROJECT: SILVERTON'S TURNTABLE (SCRATCHBUILT) (NO ROOM FOR A WYE)
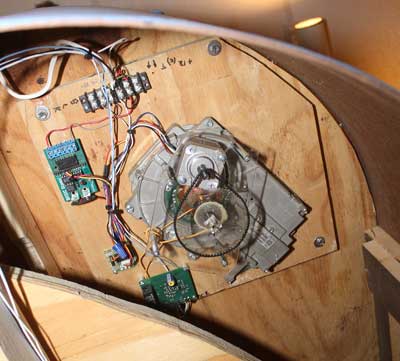
TURNTABLE MECHANISM (OLD DISK DRIVE/STEPPER MOTOR/MICROCONTROLLER)
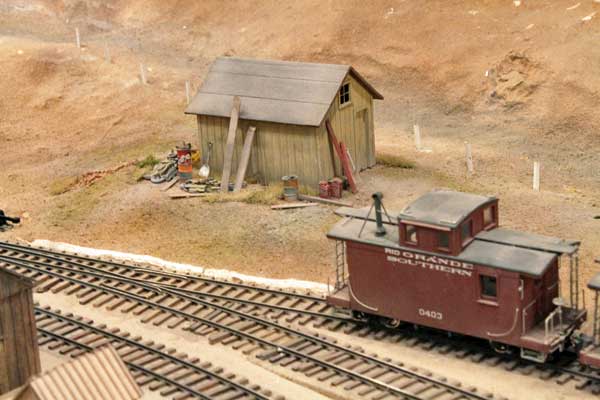
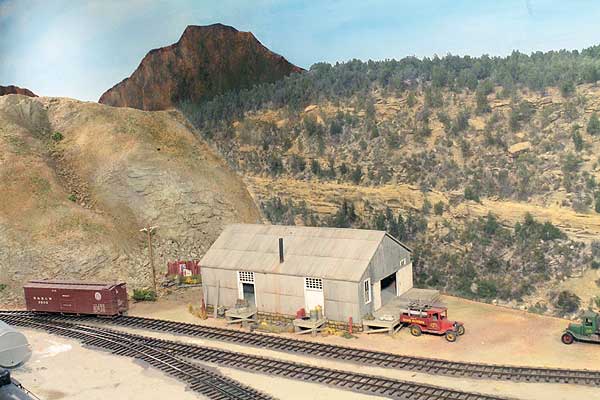
RIDGWAY YARD STRUCTURE (ART FAHIE'S SCENICING WORK!)
DOLORES TO RICO LINE (LOWER); DOLORES TO MCPHEE BRANCH (UPPER)

A FEW YEARS BACK WHEN TROUT LAKE WAS JUST ABOUT TO TAKE SHAPE
YES, IT'S A COMPLICTED TRACKPLAN!

TROUT LAKE (11-FEET LONG!) (SILVERTON IS ON LOWER LEVEL)
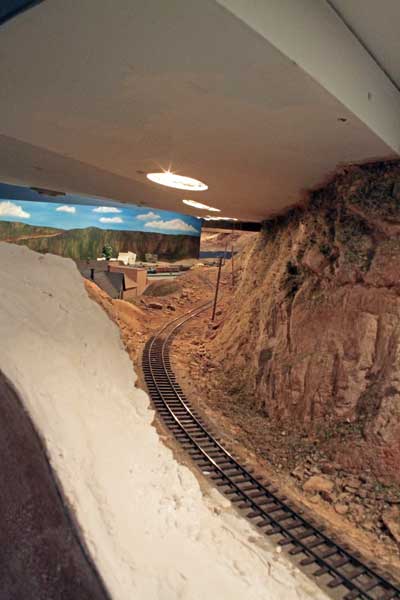
A FAVORITE SPOT -- THE LINE HEADING UP TO DALLAS DIVIDE
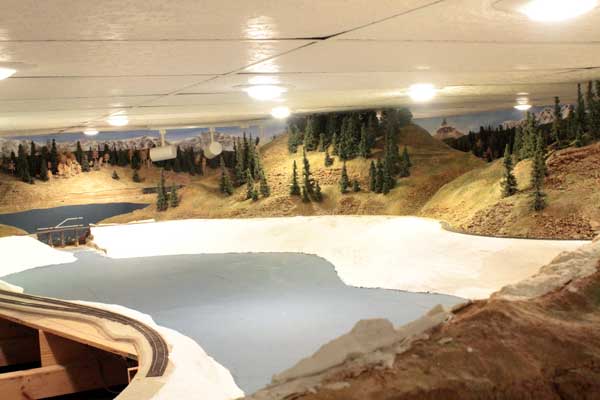
TROUT LAKE VIEWED THE OTHER DIRECTION (LIZARD HEAD IN BACKGROUND)
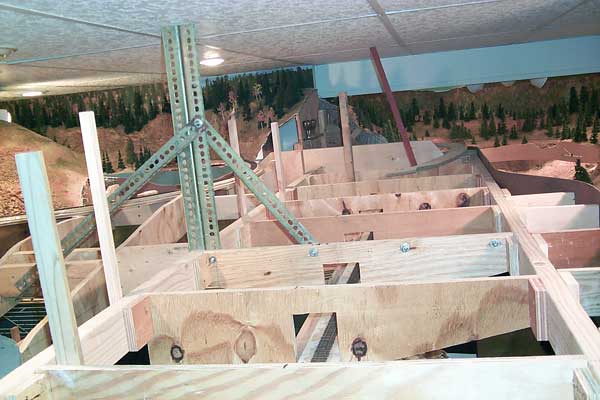
FRAMING UNDER MCPHEE. NOTICE THE "SKYHOOK" LATER DISGUISED BY TREES.
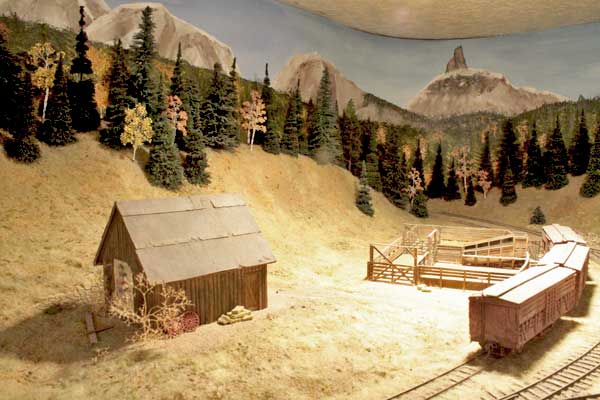
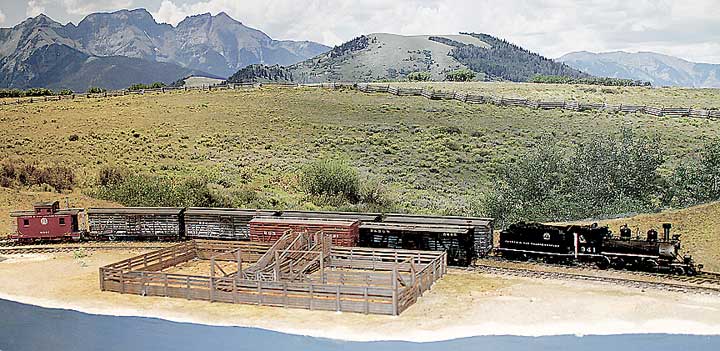
STOCK PENS AT LIZARD HEAD
LIZARD HEAD DEPOT/WYE (NO SNOWSHEDS!)
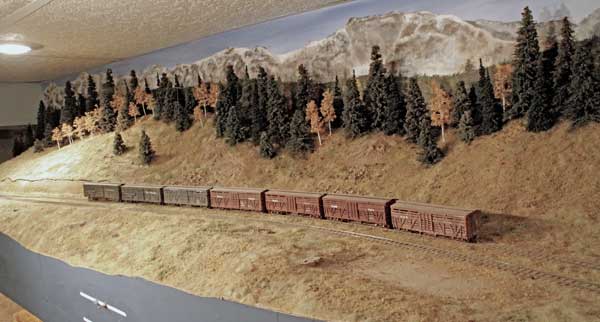
STOCK CARS STORED AT LIZARD HEAD
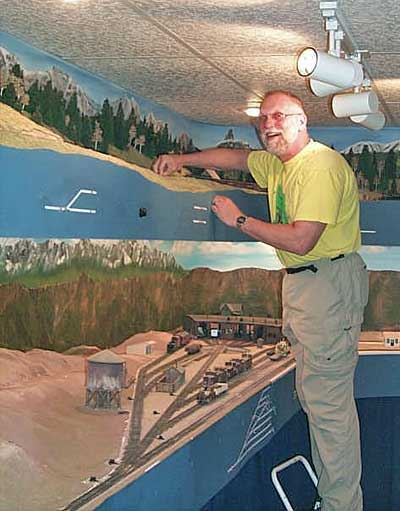
THE LINE FROM RIDGWAY TO DALLAS DIVIDE (ABOVE SILVERTON)
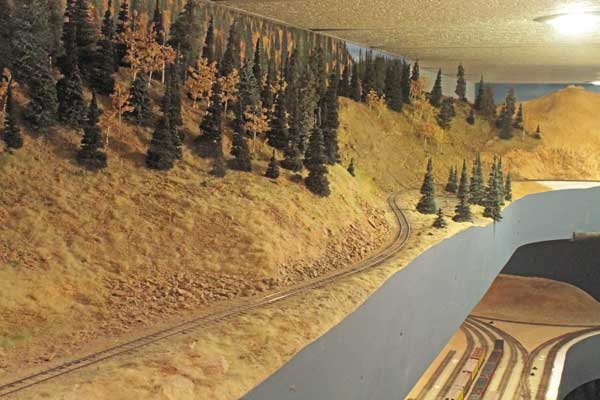
LINE BETWEEN TROUT LAKE AND LIZARD HEAD (RIDGWAY YARD ON LOWER LEVEL)
HELP FROM MY FRIENDS:
Over the years a few of my good friends lent me a hand and helped rekindled the fire to get this thing built.
CHICK SWEENEY, A FELLOW Sn3'r, HAS BEEN A FRIEND FOR NEARLY 50 YEARS.
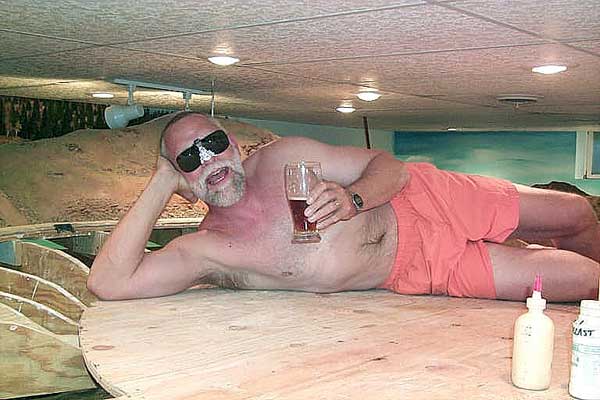
CHICK CATCHING SOME RAYS ON TROUT LAKE

ANOTHER HELPER AND LONG TIME FRIEND, ELLIS MEADS. ELLIS DOESN'T LOOK HAPPY, DOES HE. THAT'S JUST HIS WAY.
ELLIS IS A FANTASTIC HOn3 MODELER.
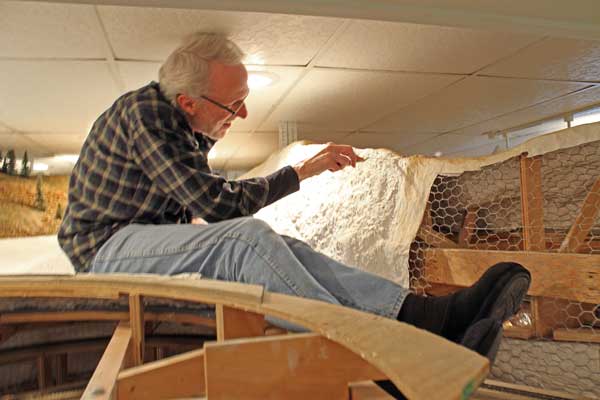
ANOTHER GOOD FRIEND, DOUG CURRIE, CAUGHT WORKING ON ROCK OUTCROPPINGS ABOVE TROUT LAKE
GETTING PLASTERED:
It takes a lot of plastering to make a convincing Colorado railroad. Sometimes having help with the job is a good thing....sometimes not:
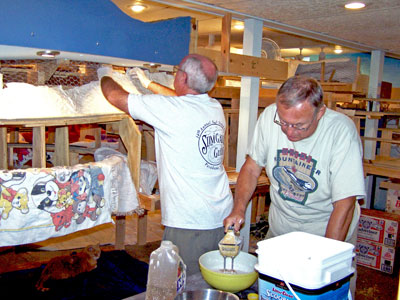
THE PLASTER CREW (BILL SCOBIE AND DON WAWRZYNIAK) HARD AT WORK
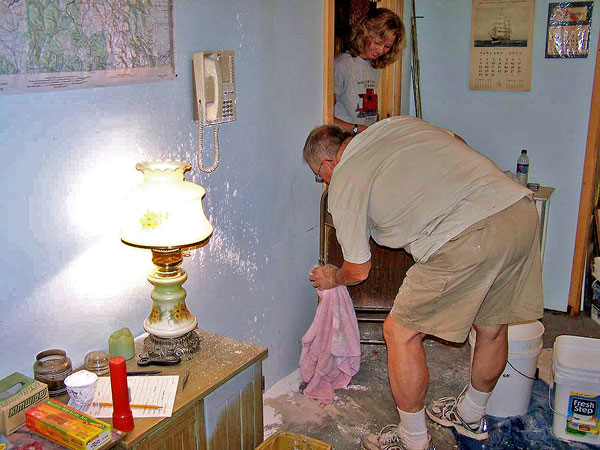
THE MIXING TABLE LEG COLLAPSED. FROM UPSTAIRS THE BOSS HEARD THE CRASH FOLLOWED BY AN "OH SH_ _ !!!!" AND DON SCRAMBLED TO CLEAN UP THE MESS.
EVERYTHING WAS COVERED IN BOTH WET AND DRY PLASTER: THE WALL, THE LAMP, THE PHONE, ...AND DON.
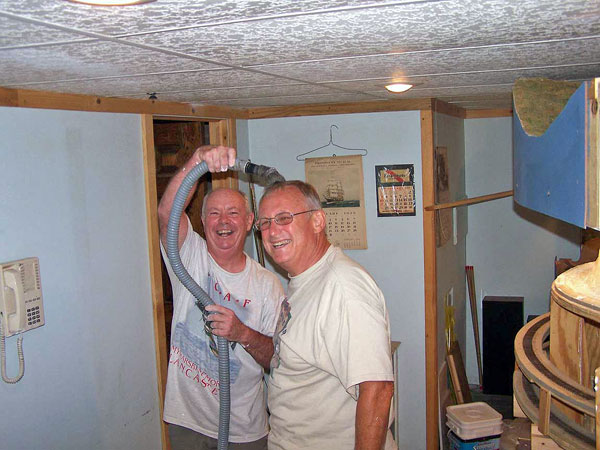
BILL PITCHED IN TO CLEAN UP DON
YES, WE HAVE A LOT FUN!!!
MARCH 10, 2014:
Although it's been a busy (and COLD) winter, I've managed to get a few more things going on the railroad. Here's a few photos:
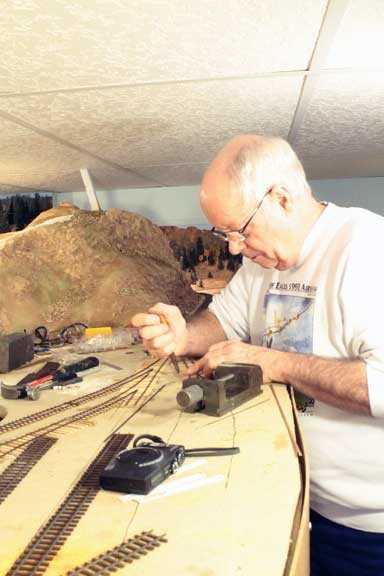
BILL SCOBIE PAID ANOTHER VISIT AND I PUT HIM TO WORK BUILDING SWITCHES IN MCPHEE, OR "MCSCOBIEVILLE", AS IT BECAME KNOWN.
I QUICKLY LEARNED THAT BILL'S A MUCH BETTER WORKER IF I PROVIDE LARGE AMOUNTS OF HIS FAVORITE REFRESHING BEVERAGE.
AND HE MAY EVEN COME BACK TO WORK AGAIN SOMEDAY....?
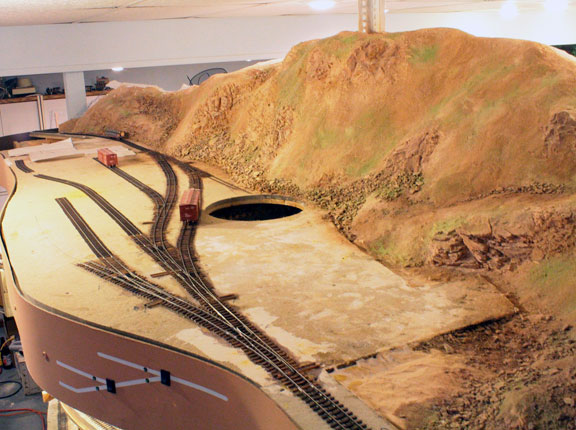
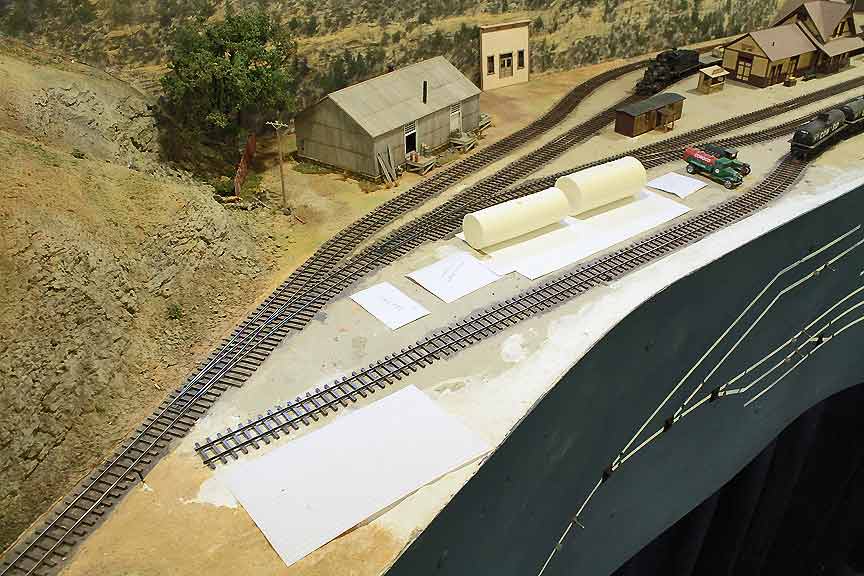
HERE'S MCPHEE AS IT STANDS TODAY. A LARGE SAWMILL WILL GO IN THE UPPER LEFT AND A SMALL TOWN WILL BE LOCATED IN THE LOWER RIGHT. A SMALL ENGINE HOUSE WILL BE WHERE THE FASCIA BUMPS OUT ALONG THE LEFT EDGE. I MAY GET TO THE TURNTABLE YET THIS WINTER...MAYBE NOT. MCPHEE IS AT THE END OF A BRANCH THAT JOINS THE RGS AT DOLORES.
I'VE ALSO MANAGED TO COMPLETE THE FIVE BRIDGES CROSSING THE LOS ANIMAS RIVER. HERE'S THE BRIDGE LEADING INTO SILVERTON (SEE ABOVE).
THIS IS A SMALL 4-SPAN GIRDER BRIDGE THAT WILL ACCESS THE ROSE-WALSH SMELTER
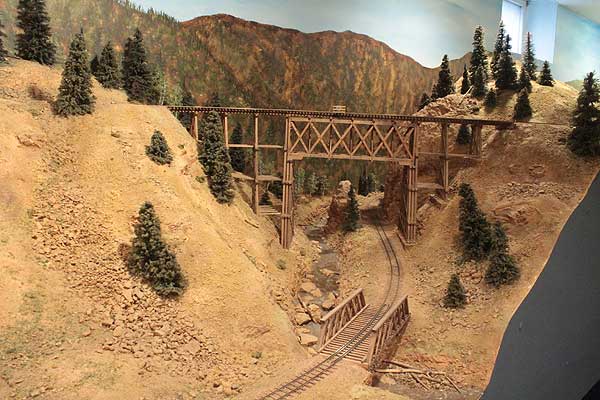
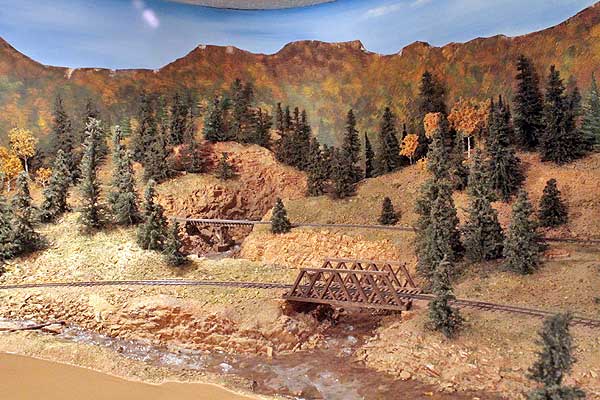
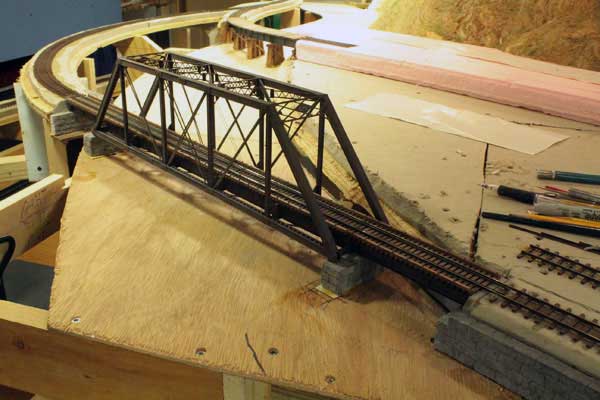
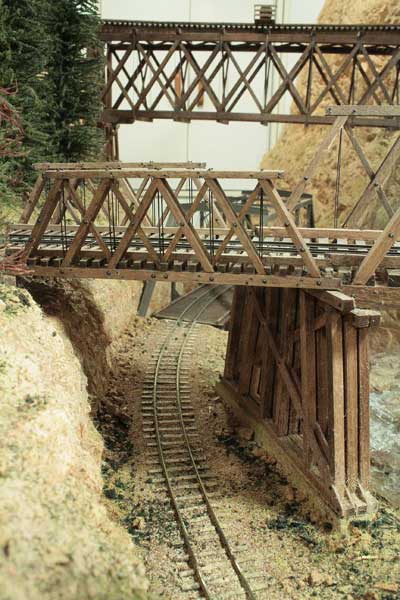
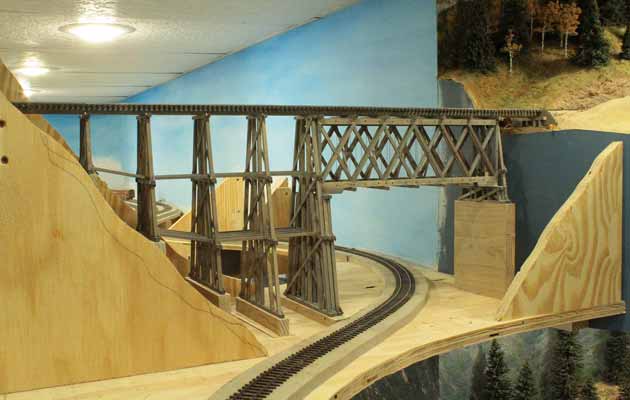
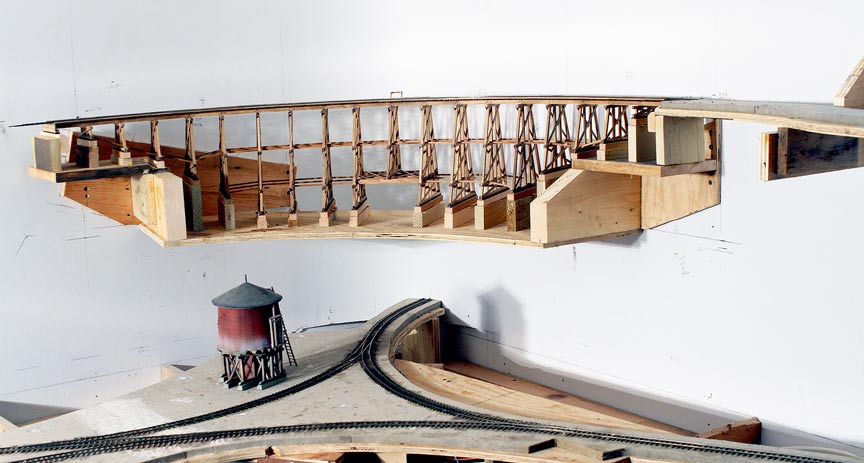
THIS TIMBER THROUGH SPAN TRUSS BRIDGE IS USED BY THE RGS ON ITS WAY FROM RIDGWAY TO DALLAS DIVIDE. LIKE A LOT OF MY TRACKPLAN, IT'S NOT PROTOTYPICAL, BUT IT WAS NECESSARY.
THAT'S BRIDGES 4 AND 5 IN THE BACKGROUND.
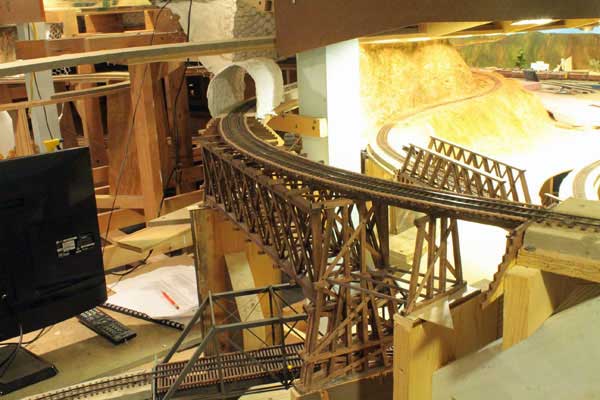
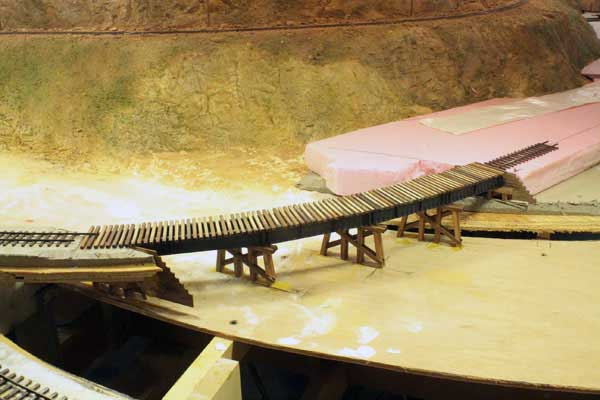
BRIDGE 4 IS ALSO TIMBER AND USED BY THE RGS. IT'S THE HIGHEST AND MOST COMPLICATED OF THE BRIDGES IN THIS AREA. AT THE MOMENT I'M ADDING THE PLASTER MOUNTAIN SIDE AND WILL UPDATE THIS PICTURE SOON.
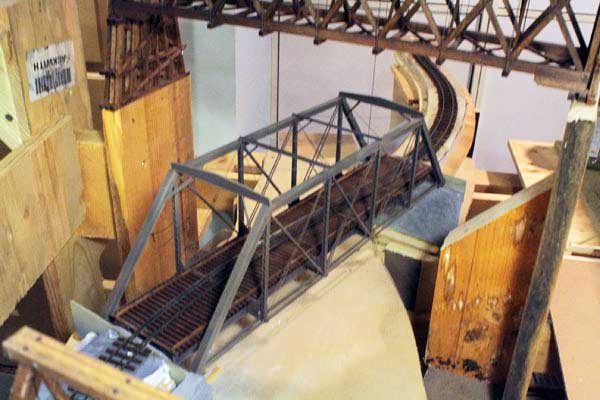
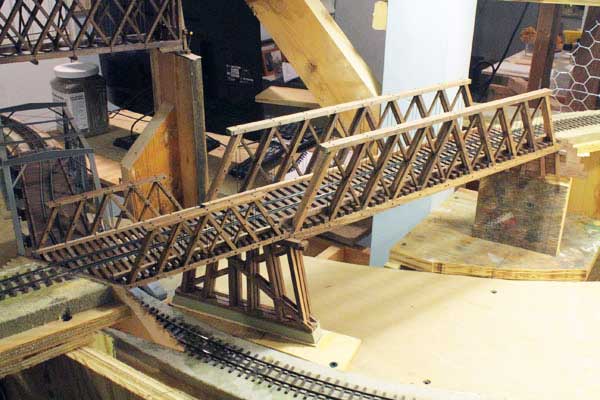
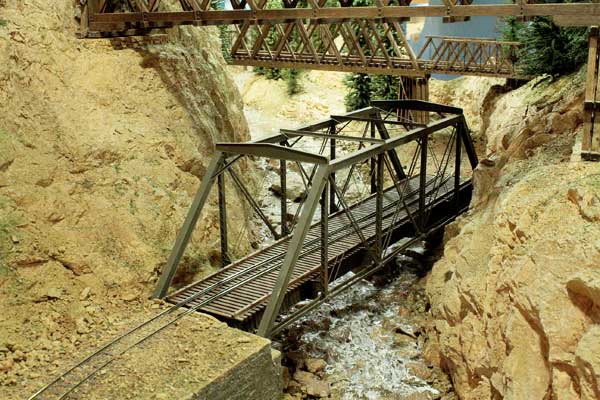
THIS IS BRIDGE 5, USED BY THE D&RGW TO REACH SILVERTON. THE BRIDGE IS DIRECTLY BELOW BRIDGE 4 AND IS AT THE HEAD END OF THE LOS ANIMAS CANYON. THIS BRIDGE HAD TO ACCOMODATE AN S-CURVE, SO IT IS WIDER THAN MOST. IT STARTED AS A CENTRAL VALLEY HO KIT, BUT I WORKED TO MAKE IT RESEMBLE THE ACTUAL BRIDGE AT CASCADE.
AT THIS POINT YOU CAN SEE THREE OF THE FIVE BRIDGES. BRIDGES 4 AND 5 ARE JUST BELOW THE LOWER LEFT CORNER. THE RIVER BOTTOM IS STILL JUST PLYWOOD, BUT SCENERY ISN'T FAR OFF.
FEBRUARY 3, 2016:
An update for this page is long, long overdue. Yes, time flies. It's hard to believe that nearly TWO YEARS have passed since I last posted a picture here. (But a TRACKPLAN has been added in that time!) Following are pictures highlighting the accomplishments made over the last 2 years. It's interesting to compare the newest pictures to those above, noting the progress that's been made. This is especially true around Trout Lake, the Los Animas River near Silverton, and the area of McPhee.
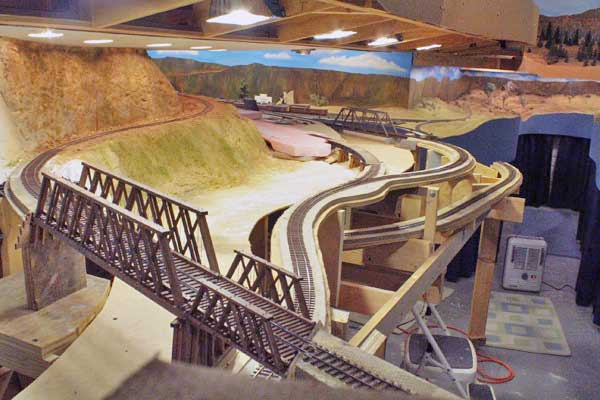
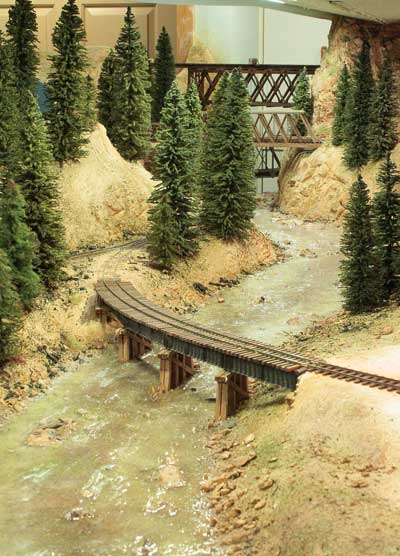
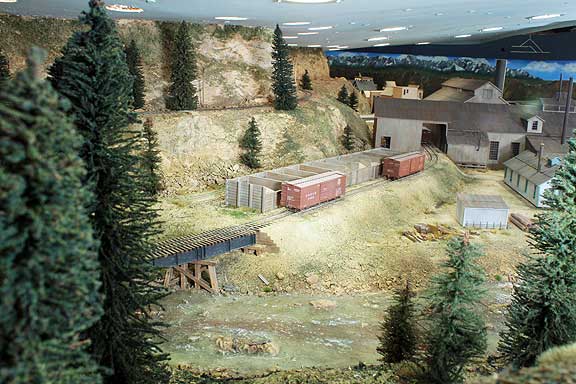
COMPARE THIS PHOTO TO THE ONE ABOVE. THE LOS ANIMAS RIVER IS NOW "FLOWING" AND MANY TREES (MCKENZIE BROTHERS TIMBER COMPANY!) (http://www.mckenziebrotherstimberco.com) HAVE BEEN ADDED. BOTH SIDES OF THE RIVER ARE NOW SCENICED AND THE AISLE HAS FASCIA. IN THE BACKGROUND THE BACKDROP IS SOON TO BE REPLACED. THE TRACK IN THE MIDDLE RIGHT PORTION OF THE PHOTO IS THE D&RGW'S LINE FROM DURANGO TO SILVERTON.
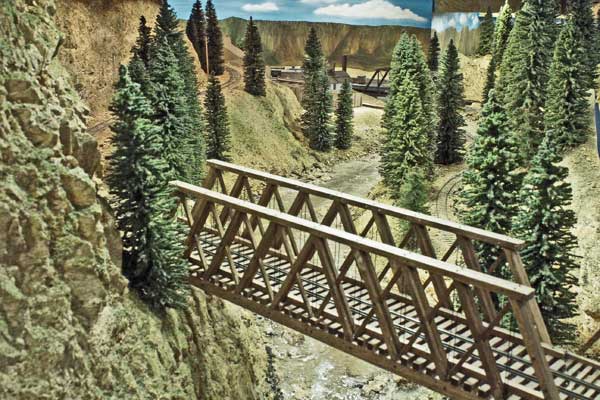
THIS IS THE SAME BRIDGE AS ABOVE, BUT LOOKING THE OTHER WAY, THE TRACK IS HEADED TO DURANGO AND ABOUT TO CROSS THE STEEL BRIDGE.
THIS IS THE STEEL D&RGW BRIDGE OVER THE LOS ANIMAS RIVER. THE TRACK IS LEAVING THE CONFINES OF THE CANYON, HEADED TO SILVERTON.
IT'S INTERESTING TO COMPARE THIS PHOTO TO EARLIER ONES, ABOVE. THIS IS THE BRIDGE CROSSING THE LOS ANIMAS ALLOWING THE D&RGW TO REACH THE SMELTER. AGAIN, NOTE THOSE NEAT TREES BY THE MCKENZIE BROTHERS! BY THE WAY, THE HIDDEN LINE THAT CONNECTS RICO TO DOLORES RUNS JUST ABOVE THIS SCENE. IT'S ACCESS FOR MAINTENANCE BY HINGED, DROP-DOWN PANELS. FOR CLEARANCE, ALL THESE TREES HAVE BEEN MADE TO BE EASILY REMOVED USING TELESCOPING ALUMINUM TUBING. IT'S A NEAT TRICK AND ONE THAT ALLOWS ME TO REARRANGE TREES WHENEVER I GET BORED.
MY FRIEND PETE SMITH PAID A VISIT OVER THE SUMMER AND I TWISTED HIS ARM INTO BUILDING ONE OF HIS OWN KITS FOR MCPHEE. IT CAME OUT GREAT!! THE ANIMAS FORKS HOUSE BEHIND THE DEPOT WAS SCRATCHBUILT BY ANOTHER FRIEND, JOHN CHLEBOWSKI. IT'S GOOD TO HAVE FRIENDS!
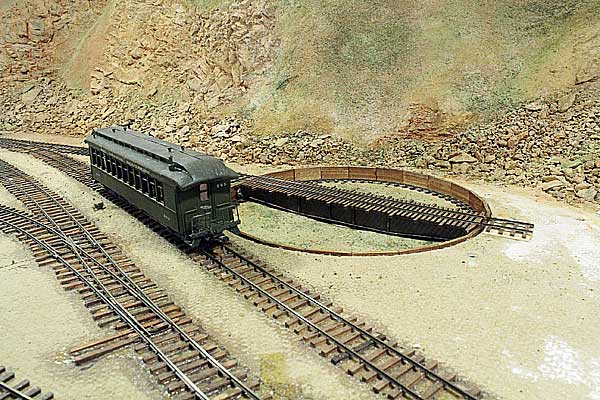
I ALSO MANAGED SOME BUILDING: THIS IS THE TURNTABLE IN MCPHEE. MOTORIZED, IT AUTOMATICALLY TURNS 180-DEGREES.
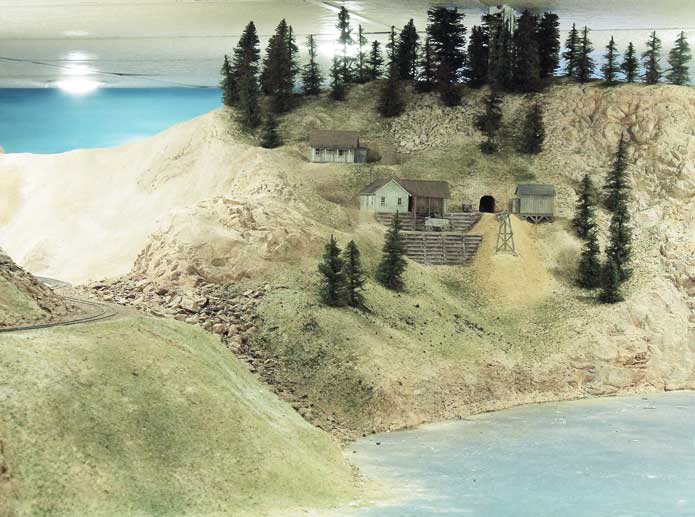
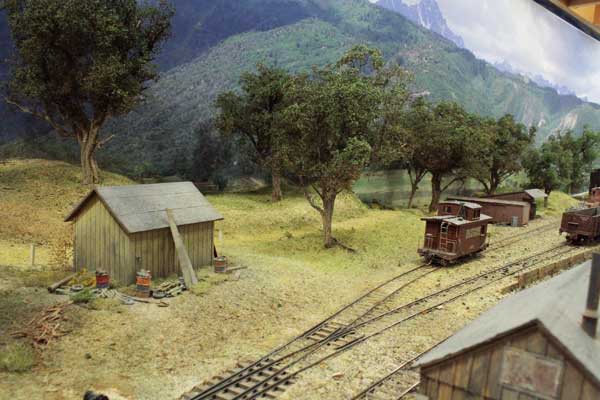
TROUT LAKE IS STILL NOT FINISHED, BUT GETTING CLOSER. THIS IS A (FICTITIOUS) MINE I LOCATED AT THE UPPER END. I BUILT IT TO HO-SCALE, PROVIDING "FORCED" PERSPECTIVE. MORE CLUTTER AND DETAIL IS NEEDED. THE TRACK ON THE LEFT IS THE RGS MAINLINE HEADING TO LIZARD HEAD. TROUT LAKE HAS ALSO RECEIVED THE DAM KEEPER'S HOUSE AND THE OUTLET WORKS, BUILT IN S-SCALE.
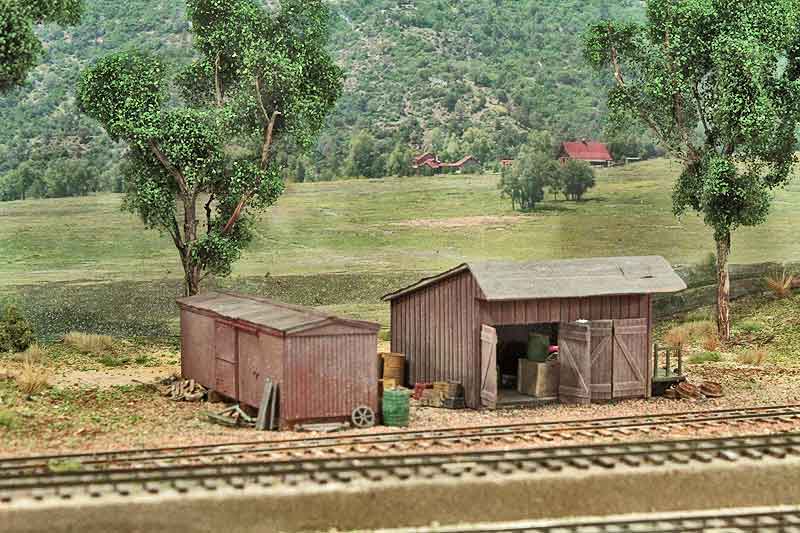
HERE'S WHERE THE SHOWMODEL OF THE MAUDE MONROE MINE ENDED UP -- JUST SOUTH OF THE RIDGWAY ENGINE TERMINAL. THE SMALL WAREHOUSE ON THE RIGHT WAS SCRATCHBUILT USING DON GRIFFIN'S EXCELLENT DRAWINGS (http://clearcreekmodelengineering.org) OF THE MAUDE MONROE MINE AND OUTBUILDINGS. DON OFFERS A GREAT LIST OF VERY AFFORDABLE (AND ACCURATE) STRUCTURE DRAWINGS. CHECK THEM OUT!
BY THE WAY, I JUST RECEIVED THE PHOTO BACKDROP FOR RIDGWAY FROM DALE KREUTZER. ONCE INSTALLED, IT WILL MAKE A BIG CHANGE IN FUTURE PHOTOS.
MORE THAN A FEW OF YOU HAVE ASKED ABOUT THE STATUS OF THE SMELTER. I'M WORKING ON IT. ABOVE IS A PICTURE OF THE TEST BUILD SETTING IN PLACE ON THE LAYOUT. (THE ASSAY OFFICE AND RECEIVING SHED/BINS ARE KITS CURRENTLY AVAILABLE SEPARATELY.) A FEW MORE DAYS OF DRAWING DETAILS REMAIN, AS WELL AS BUILDING THE SHOW MODEL AND WRITING INSTRUCTIONS. I'M HOPING APRIL WILL BE THE RELEASE DATE.
A WORK SESSION WAS ALSO HELD IN JULY, 2015. ABOVE, BILL MEREDITH PAID HIS FIRST VISIT TO MY RAILROAD AND WAS ASSIGNED THE TASK OF CONSTRUCTING SHELVING BENEATH THE MONTROSE STAGING YARD. THE SHELVES ARE NOW COMPLETE (AND FULLY LOADED) AND THE OLD STORAGE ROOM IS NEARLY READY FOR THE RAILROAD'S EXPANSION. THANK YOU, BILL!
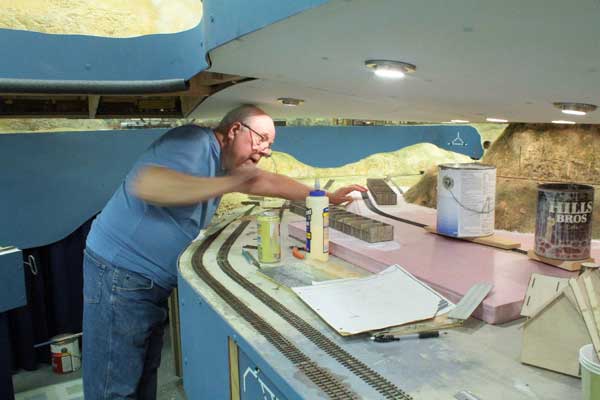
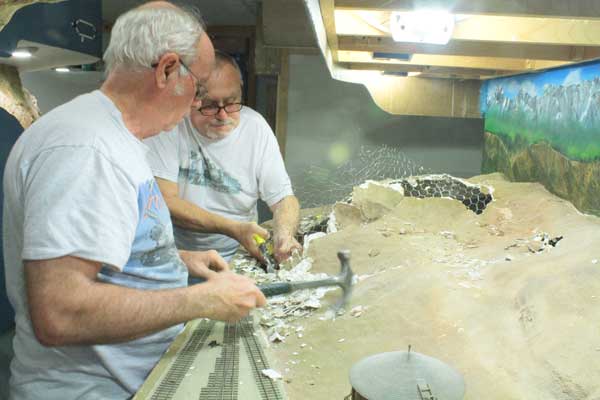
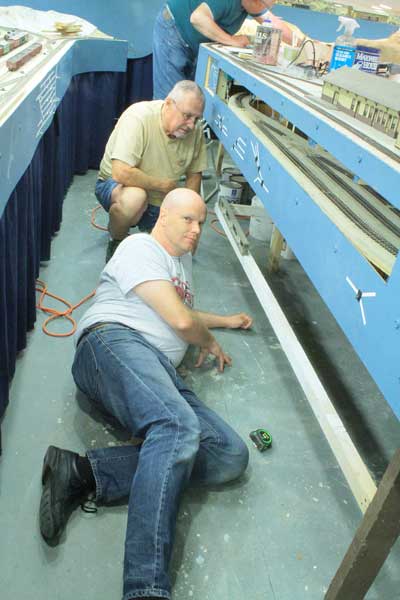
DAVE THOMPSON IS SHOWN IN THE LEFT PHOTO LAYING THE TRACK FOR THE SMELTER. IT'S A TIGHT FIT FOR DAVE. DAVE'S AN EXCELLENT HOn3 MODELER AND DOES A PRETTY GOOD JOB WHEN FACED WITH SN3! THE RIGHT PHOTO SHOWS BILL SCOBIE TRYING TO FIGURE OUT WHICH WAY IS BEST FOR USING A HAMMER AND DON WAWRZYNIAK IS BITING HIS TONGUE. THESE GUYS WERE REMOVING SCENERY IN PREPARATION FOR INSTALLING THE MAUDE MONROE SHOW MODEL.
SEPTEMBER 10, 2016:
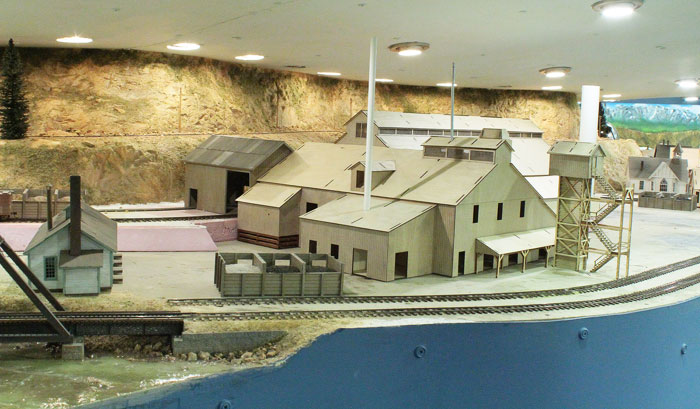
Now that the Rose-Walsh Smelter kit is finished, I've installed the "show model" on the layout. Here's a gallery of pictures I hope you enjoy. The figures are all from Fun & Games (http://www.scalefigures.com/).
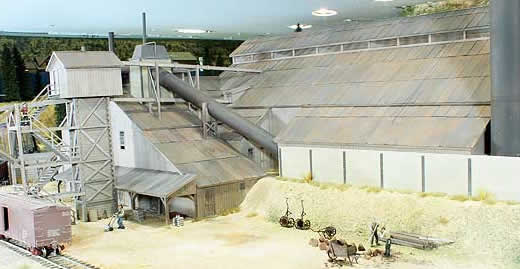
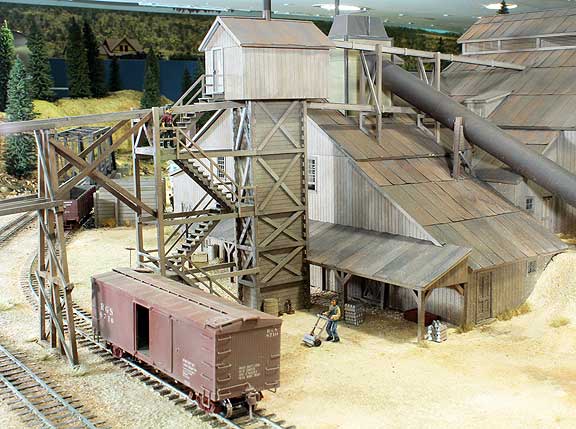
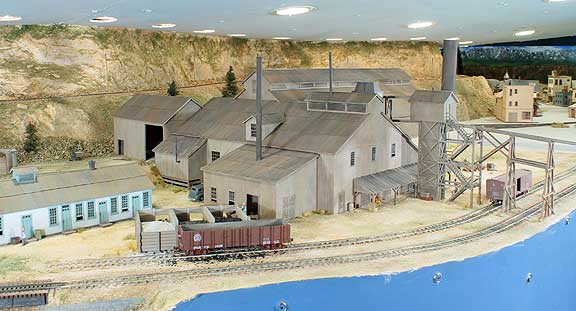
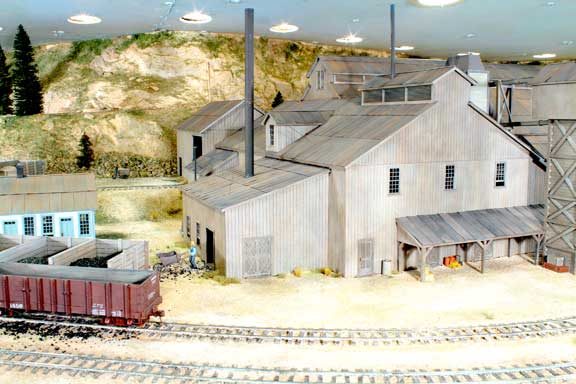

As with every structure on the layout, much more "clutter" and "detail" could be added, but there's SO many other things that need to be done!
JANUARY 13, 2017:
Good progress has been made on the railroad in several areas over the last several months. Chick Sweeney, Bill Scobie, and Don Wawrzyniak stopped by and we managed to finally get the Ridgway backdrop installed, made by my friend Dale Kreutzer (yes, it's GOOD to have FRIENDS!). In spite of the backdrop being 33-feet long, it was still short at both ends and Dale had to make "extensions" -- reverse images of each end that could be matched up with the original. The splices turned out at least as good as I'd hoped, maybe better! In all, this section of backdrop is approximately 52-feet long! During the installation most of the "foreground" scenery (mostly underbrush) had to be removed and is yet to be replaced. (Just something else to add to the list.)
I did manage to do a small foreground scene between the backdrop and the engine terminal. It's truly amazing the difference the backdrop makes:
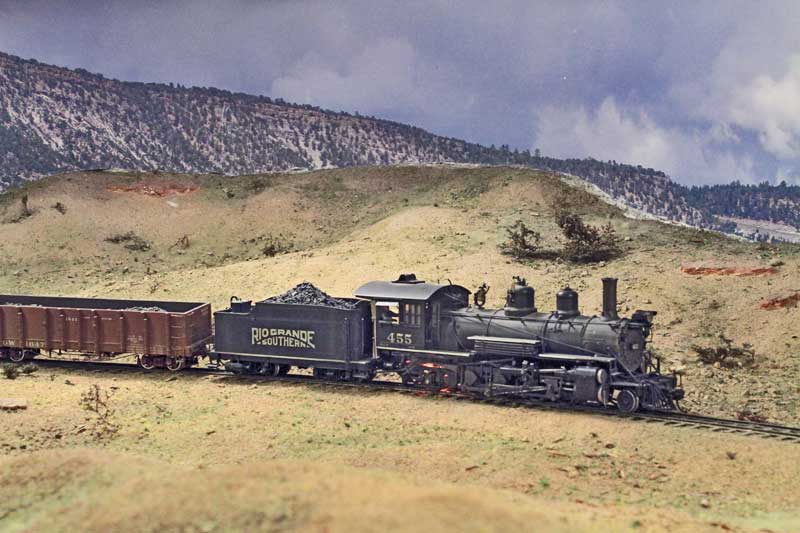
Here's a shot of #455 after just leaving the Ridgway yards on it's way up to Dallas Divide. Nothing has been done yet to blend the backdrop into the hardshell scenery, but I think it still looks good:
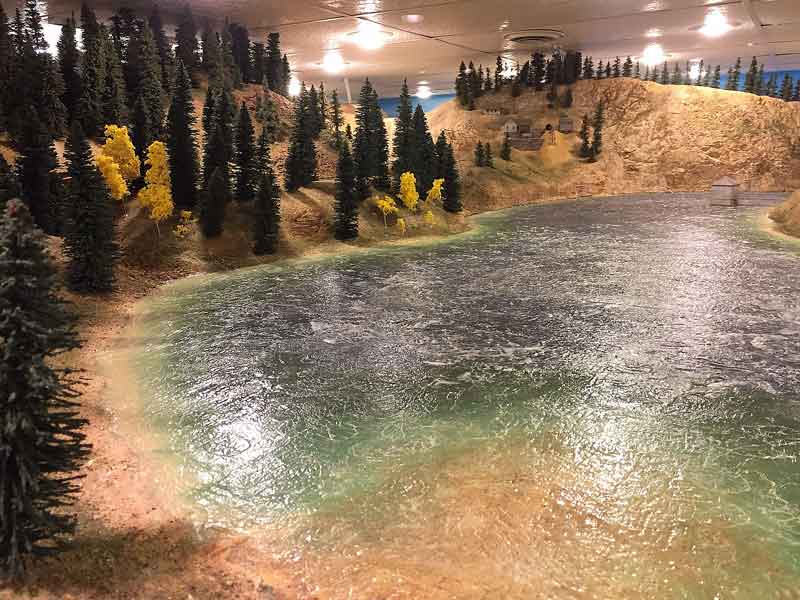
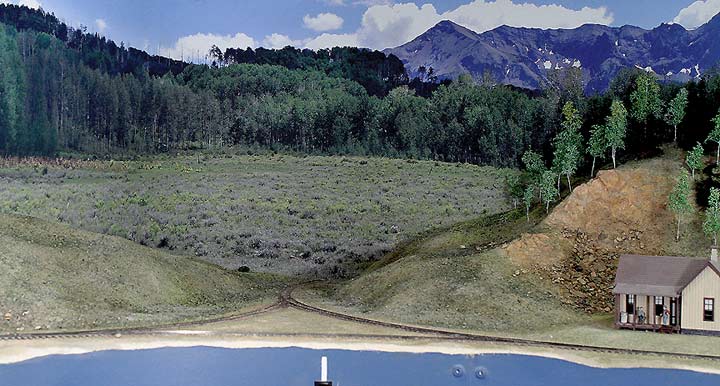
Another area that received a lot of attention was Trout Lake. Hundreds of McKenzie Brothers Timber Co. trees were "planted" http://www.mckenziebrotherstimberco.com along with several dozen home-made Aspen. A lot of other things were required to "finish" the scene (including the water!), but I now call it DONE, at least for a while.
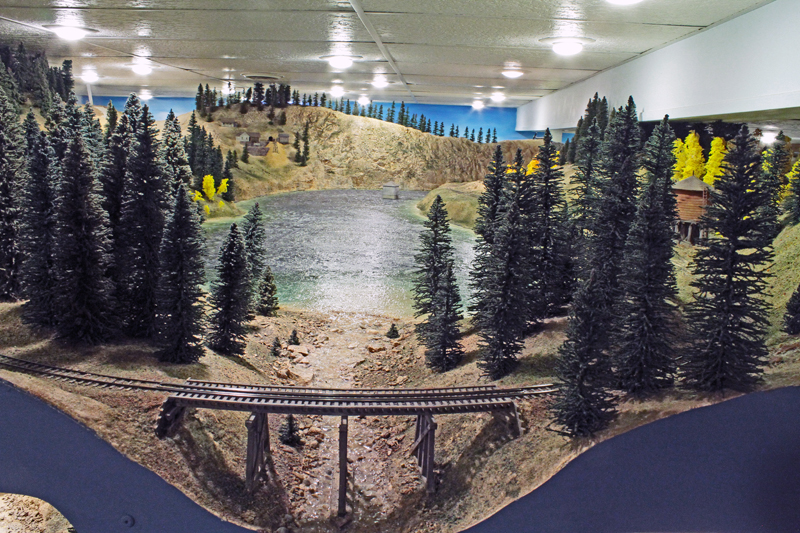
The lake is about 11-feet long. There's an access hatch in the middle.
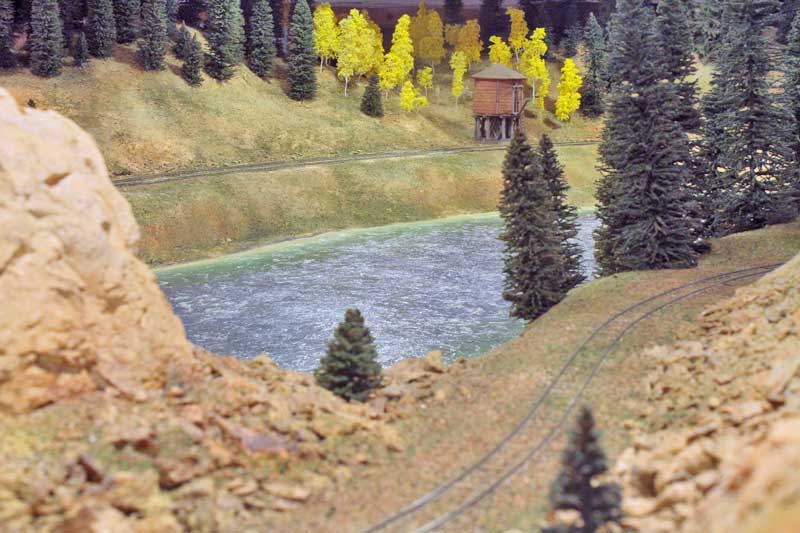
The track in the foreground is heading for Lizard Head.
That's the Dam Keeper's House and Outlet Works. The wall in the background will eventually be removed.
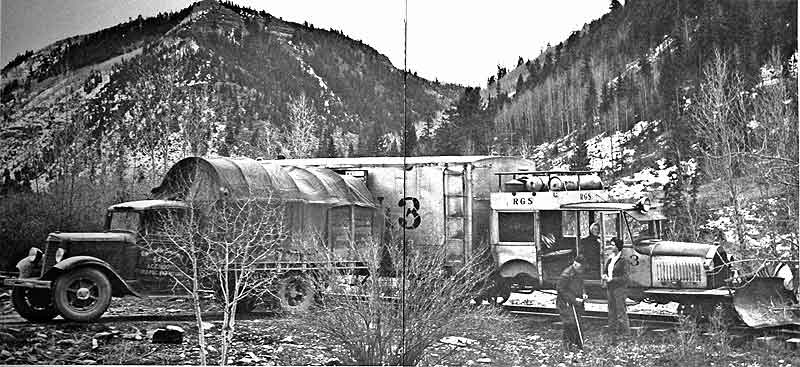
Chick Sweeney surprised me at Christmas with the RGS truck. He wanted me to recreate the scene in Mal Ferrell's Silver San Juan book, pages 346 and 347. Check it out!
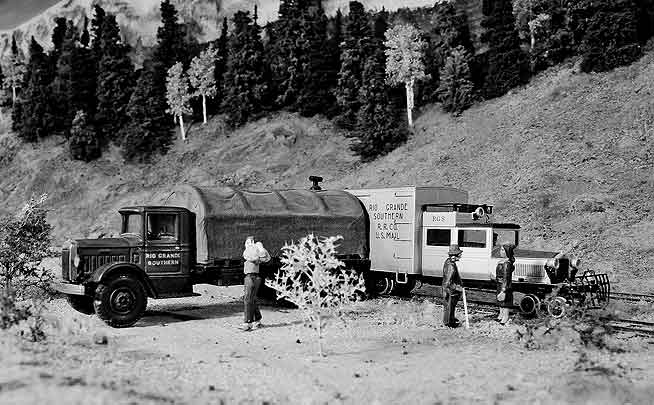
Here's the photo from Mal's book (I hope he doesn't mind!):
MARCH 9, 2018:
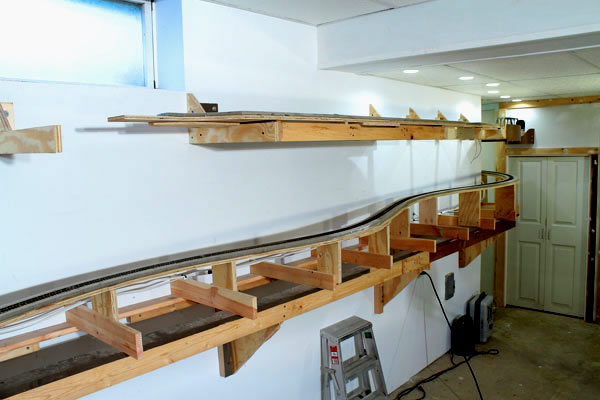
I can't believe it's been more than a year since I updated this page...wow, how time flies! But it's been a very busy year and a lot was accomplished. Not all of it was directly railroad related, but much of it helped "clear the decks", so to speak, to eventually free up more time to build. I've come to the conclusion that I need to get 100% of the main line installed to allow the entire railroad to be operated. As it now stands, I have three separate railroads that will EVENTUALLY be connected into one. Towards this goal, I've started "finishing off" the shop area where Placerville will be located (and the Gallagher Trestles on the upper level) by firring out the walls, insulating, adding sheetrock, and installing the drop ceiling. The woodshop remains in the basement for now but will eventually be moved to the garage (much to Lori's dismay).
Here's what's been accomplished since the last update:
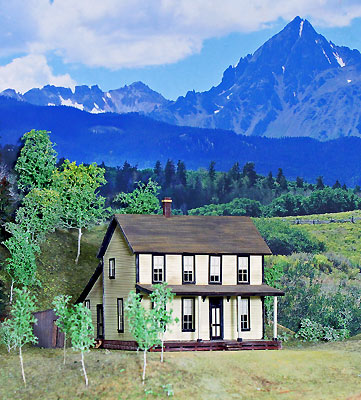
A lot of work was invested up at Dallas Divide (see track plan via the link at the top of the page). The room was finished off (sheetrock/drop ceiling/lights), benchwork was installed on both the upper level (Dallas Divide) and the lower level (Ouray), and all roadbed and track was installed and wired at Dallas. My friend John Chlebowski, a voracious structure builder, scratchbuilt the ranch house and assembled the section house, bunk house, tool shed, and coal shed for the site.
Bunk House and Section House at Dallas Divide
Ranch House at Dallas Divide
Early in the year my friend Jon Addison paid a visit and we worked on scenery (something Jon's very good at!), namely making better cottonwood trees for Ridgway. A photo in last year's update shows my first effort that I was not happy with. Jon and I sat down and added Super Tree "branches" to sage brush armatures, followed by painting and leaf flocking, coming up with some beautiful trees. They've replaced my original trees in Ridgway and are awaiting the addition of more (as always!).
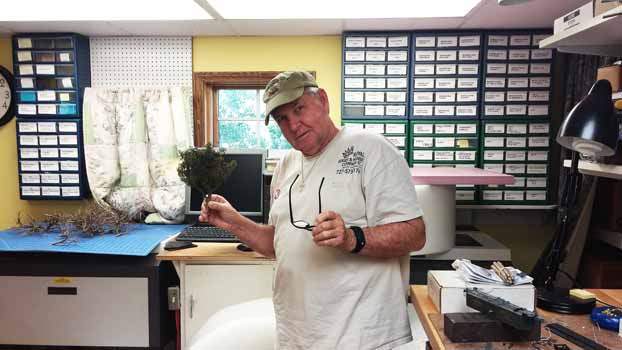
Jon showing off his latest creation
New Cottonwoods installed at Ridgway
Once the tree "problem" was solved at Ridgway, I decided it was time to FINALLY start the ground cover in the Ridgway area. After all, the Homasote had been there for at least 20 years...why not make some progress? I added the basic ballast (more dirt than rock) and a coating of weeds/grass. What a difference it made! I still need to go back and fill in the materials around the switches as well as add the taller weeds and general junk. But that can wait...but hopefully not another 20-years!
Engine house area with basic ground cover
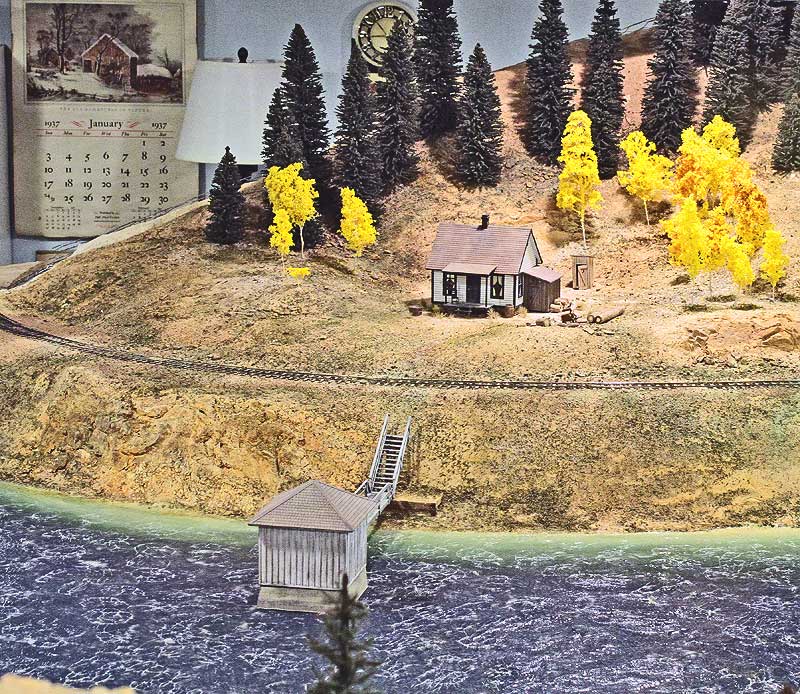
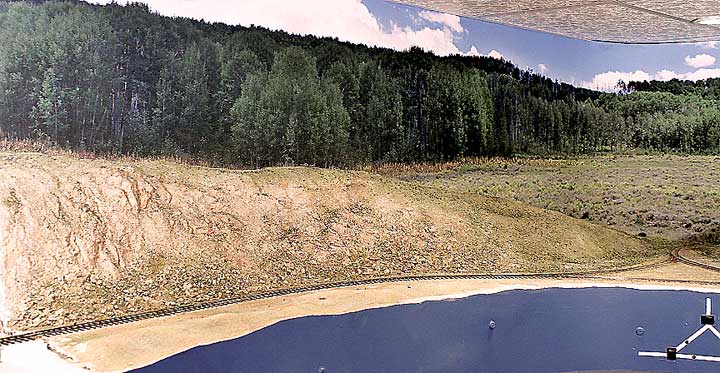
This was Jon's first visit to the layout and he was impressed enough with the Trout Lake scene to take the following pics -- I thought you'd like them.
View at upper end of Trout Lake (yes, there's a trap door in the middle for access)

This is a rarely seen view of the dam at the lower end of the lake
Jon paid a second visit in November and brought along an "extra" structure he had. Somehow, while he was here he had the patience to sit and paint "scrap" detail parts for an entire day. He's a great teacher -- I had quite a lesson! Here's the result, located near the tracks in Silverton:
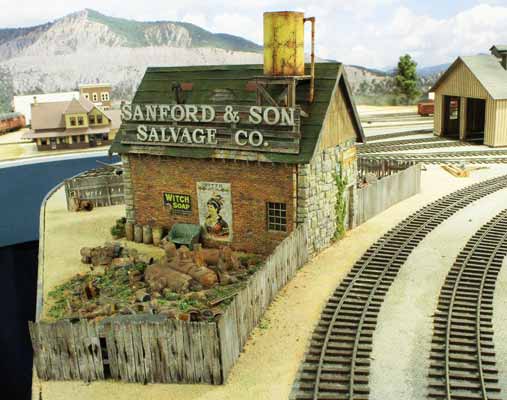
Jon Addison's Sanford & Son Salvage in Silverton
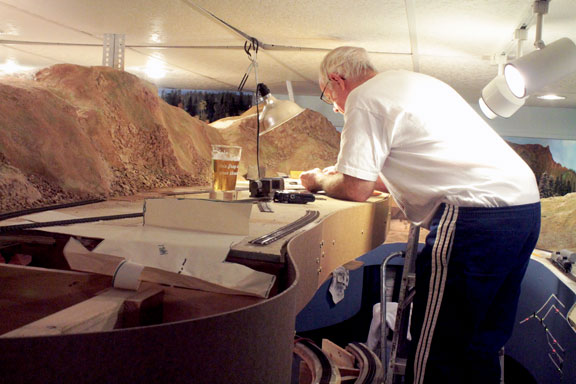
Another railroader that made the mistake of visiting (because I put him to work!) was my friend Jim McHenry, a.k.a.: JimmyMac. Here's Jim adding scrub brush to blend in the backdrop just outside of Ridgway:
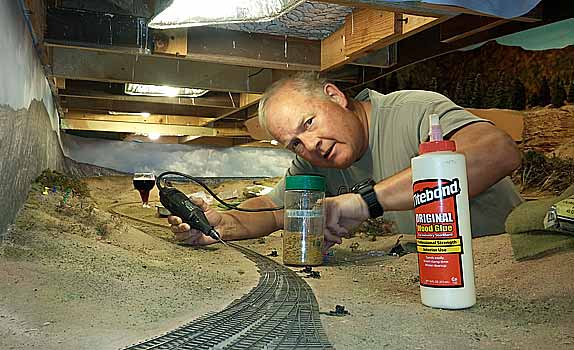
Note: keep helpers well lubricated (BEER!) -- they don't mind tight places so much.
While we're in the Ridgway area, here's a shot of the Maude Monroe mine showing progress made with the surrounding scenery:

Finally, what would a year be without a visit from my good, good friend (and holy terror to railroads throughout), Bill Scobie. Here's Bill in his usual state of mind:
It's too early for a beer, darn it!!!
Bill did some great work while he was here building the trestle that carries the RGS over the last "duckunder". The track is running from Lizard Head, into and through the furnace closet, and eventually on to Rico. In the photo Bill is making one side of the bridge.
Trestle carrying line from Lizard Head to and through the furnace closet (left)
The track running beneath the trestle is the mainline heading up to Dallas Divide (located in the alcove beyond) from Ridgway. The plywood base is 58-inches above the floor. The trees you see in the lower right corner are those around the Maude Monroe mine outside of Ridgway.
Spring isn't far off so just how much progress will be made in the near future is unclear. When I can, I'll be focusing my efforts at extending the mainline from Dallas Divide down into Placerville on the lower level and extending the line from Lizard Head towards Rico on the upper level. The railroad marches on!
JULY 24, 2019:
Once again it's been more than a year since I've updated this page. This time, however, I feel more should have been accomplished on the railroad but life has its priorities! We released a new kit in February (2019) and once again the business has consumed far too much of our "retirement", but I sincerely thank all of our loyal customers. I hope to have another new kit ready early next year -- it sure helps when all the bills start arriving!
Let's start with some updates on areas of the layout you've already seen and then move into the "new" stuff!
Here's a new, Ridgway Depot that my good friend John Chlebowski built to replace the very first "kit" I designed. Back in 1995 I designed the depot which eventually was marketed by Bill Banta. Unfortunately, I misinterpreted a "match line" on the drawings I was using and the kit turned out to be several inches too long. I also painted my original model using poor color choices, so John was generous enough to build me one to the right length using appropriate paint colors. He also did a great job adding interior details and lighting. Now that the backdrop is in place (thanks to Dale Kreutzer) and the depot is open for business, I don't have much choice but to start thinking about finishing up my town of Ridgway!
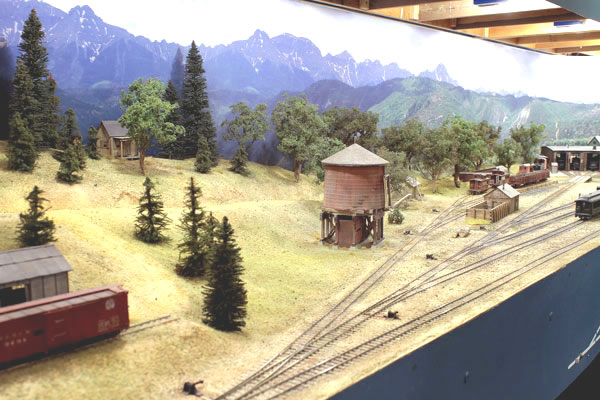
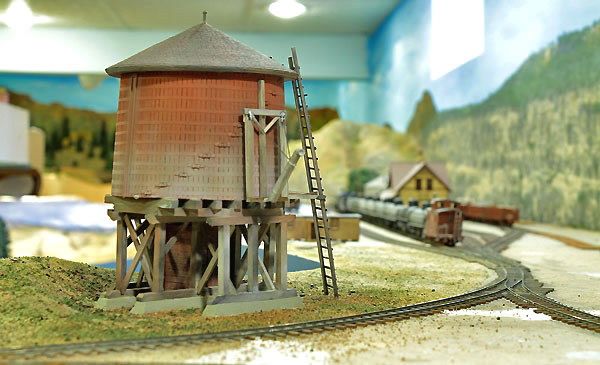
Another project that had been waiting was the Ridgway water tank. Again my friend and awesome modeler, Bill Scobie took it upon himself to get things moving. I guess he decided he'd looked at my stack of water tank kits long enough. He took them home and assembled four at once. The tank above may not exactly meet the "rivet counters" idea of the Ridgway tank, but it's more than perfect for my railroad...and it's INSTALLED (finally)! I also added more trees nearer the tank, probably with a few more to come.
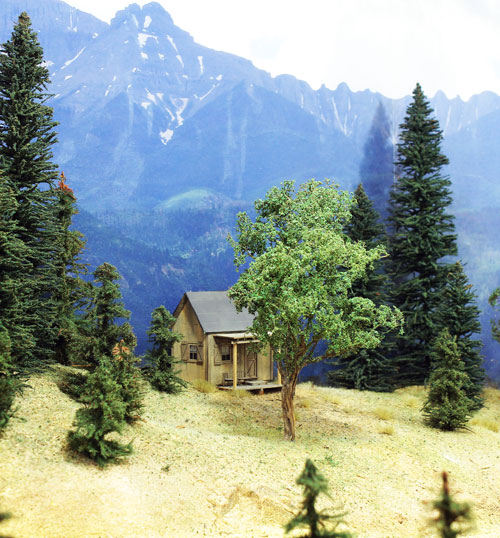
Did you notice the small cabin above the water tank in the previous picture? The above photo is a closer view. I'm proud to say the cabin was once located on Paul Scole's layout and I was lucky enough to move it to mine. I also have a couple of HO structures from Jim Vail's layout, but they aren't "finalized" yet at the mine above Trout Lake (yes, the mine is HO for "forced perspective"). I'll try to get pics for the next update.
Here's another of Bill's tanks. This is on the wye in Dolores.
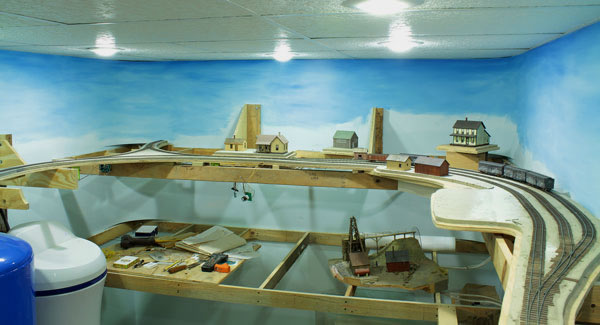
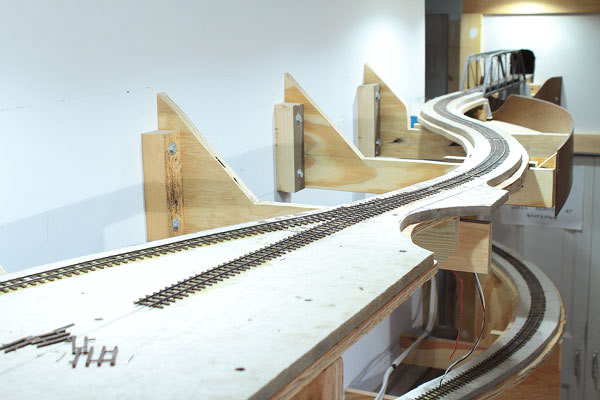
Moving on to what's been happening in the "expansion" department, the above photo shows the current status of Dallas Divide (below is the benchwork for Ouray). As you can see, John Chlebowski was busy with building the needed structures and I completed the wye and three passing tracks. I received the photo backdrop about a week ago and it should be installed before the next update, but first will come the hardshell scenery.
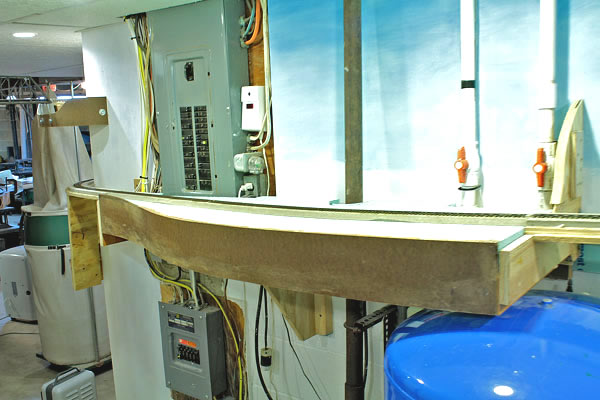
Just beyond Dallas Divide is where all the house's services (phone, electric, water) are located. For maintenance purposes, I decided to install a "liftout" in this area. It's the section of the railroad in the picture with the masonite fascia in place. The section is approximately 62-inches long and is made from two 1-inch layers of foam insulation board. It's held in place by four rare-earth magnets, an idea taken from one of Jim Vail's articles in the Gazette. It works quite well!
Moving around the corner from the liftout, the track now continues down a steep (nearly 3% grade) headed to Placerville (to the left). The upper level has also been extended out of the furnace closet, crosses the aisle, and reaches the logging mill located between Lizard Head and Rico.
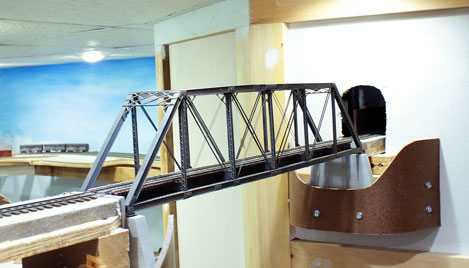
Here's the Central Valley bridge I built to carry the RGS over the aisle. The bottom of the bridge is more than 69-inches above the floor. At the time I built the "steel" bridge, I wasn't sure if the railroad had any wooden truss bridges that would span 100-feet. I now know they did so the bridge may be replaced with a wooden span in the future. This bridge could be moved to Durango, crossing the Los Animas, if the day ever comes.
This is the main line headed for Rico with the switch for the logging spur for the small sawmill that will be located between Rico and Lizard Head. The track running from Dallas Divide to Placerville is located on the lower level.
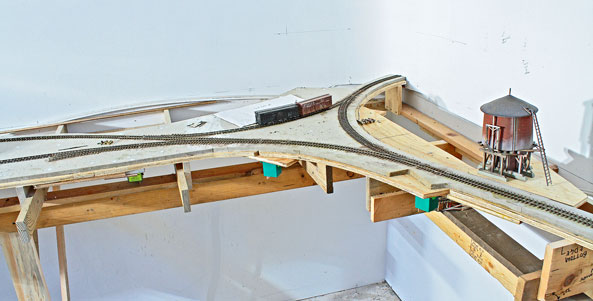
When the lower level reaches the far wall it enters the wye at Placerville. The depot will be located to the left and the stock pens are planned to go where the stock cars are spotted. The water tank is another of Bill's. Normally I would build the upper level in this area first, but bridge 57A will be installed directly above the wye and I had to be sure the planned "clearances" were going to work out. My good friend John Kalin has both 57A and 57B ready and waiting in St. Louis. Transport is still being worked out.
This latest expansion required 8 switches be constructed. This is the first time I used Fast Tracks jigs -- namely, the frog filing fixture and the points tool. They were a big help in filing the rails to shape and took most of the frustration out of building switches. I just wish I'd had them for the first 100 or so that I've built!
Here's the town of Placerville itself. The wye is located in the upper right of the photo. That's our new Railroad Warehouse kit next to the depot (not where the prototype's was located). I'll install it with the platform on this side so it can be better viewed from the aisle. The depot, of course, is the prototype of our kit. Another track will parallel to the one on this side of the warehouse. It will serve both the "Flour and Feed" warehouse and continue on to the Texaco distributor. The two tracks shown in the photo will join off to the left, just before the track crosses the San Miguel River (to be located between the wall and the furthest track). Placerville had to be "skinnied up" a bit because across the aisle from it will be Telluride and Pandora on the upper level and Mancos on the lower level, but these are probably years away!
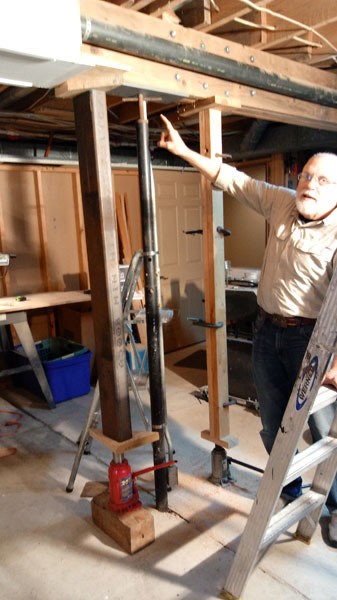
Getting ready for the next expansion project required a third hand provided by my good friend Chick Sweeney during a recent visit. (I think you might already see why I didn't employ Lori's help on this one.) Before any additional benchwork or track can enter a new area I always apply sheetrock and insulation to the walls as well as a drop ceiling overhead, boxing in the beams that support the house as I go. When the railroad entered the woodshop, I went as far as I could along the main beam until I hit a snag. When I built the house (1979), I'd used a large block of oak to spread the load between the beam and the post. Now, the block was too thick and would have been bulky to sheetrock. I elected to replace the block with a 1/2-inch thick steel plate. This required jacking the house up. Once Chick arrived for his visit I had the "right" expertise -- someone who wouldn't question my sanity (too much). But my 10-ton jack wouldn't do the job by itself, so we borrowed a 20-ton jack from my neighbor. (It's good to live in the country where more times than not a neighbor will have a spare 20-ton jack.) Once both jacks were in place and working we managed to jack up the house without making too much noise (the wives were upstairs) and quickly swapped out the oak block with the steel plate. We returned the jack to my neighbor and breathed a sigh of relief while enjoying a well earned beverage. Boxing in the beam can now proceed and the RGS can move forward!

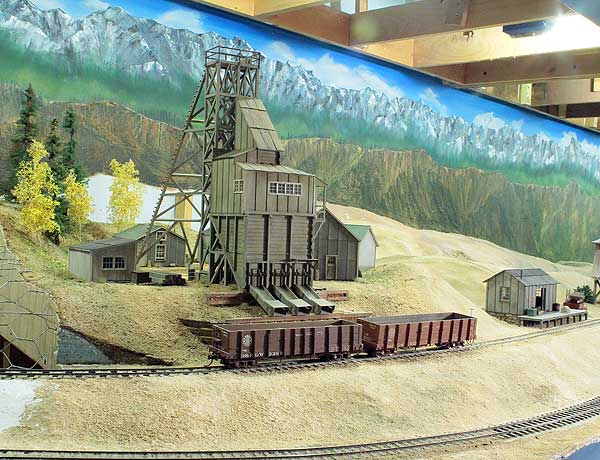
I just wanted to show a couple structures waiting for their final locations to be built. Above is a beautiful little mine that was "orphaned" when Bob Christopherson scrapped his marvelous Sn3 layout before moving to Texas. A little worse for wear for the transport across the country, the mine will find a home at Matterhorn (between Trout Lake and Ophir) on my RGS. It will be in place of the prototype's San Bernardo Mill. Thank you, Bob!
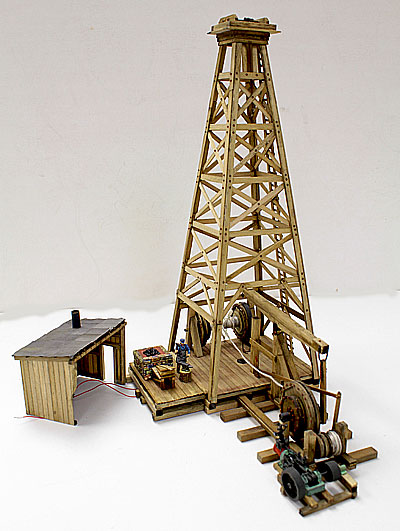
Above is another wonderful structure I'm lucky to have. Ted VanPelt built two oil derricks for his layout and ended up only using one. This one will be located in the area of Durango. It will make a great little industry for those tank cars to serve. Thank you, Ted (and Joyce!)
There's a lot of great people in this hobby!!!
August 25, 2021:
I can't believe more than two years have passed since I last updated this page! Yes, those two years introduced us to COVID-19 and a new way of life. I didn't think I'd progressed much in that time until I walked through the layout and listed what needed to be included in this update. Now I don't feel quite so bad! Here's most of what's changed on my RGS in no particular order.
Because of COVID we've had nearly zero visitors and zero work sessions. However, my friends have been busy and supportive as always and have continued to supply me with more than I can keep up with.
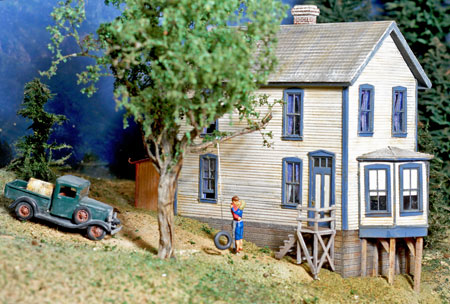
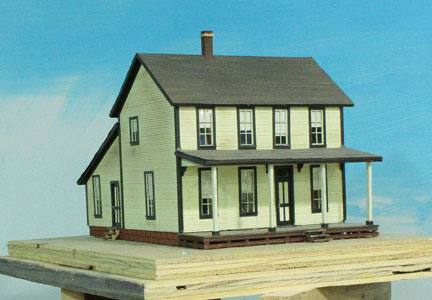
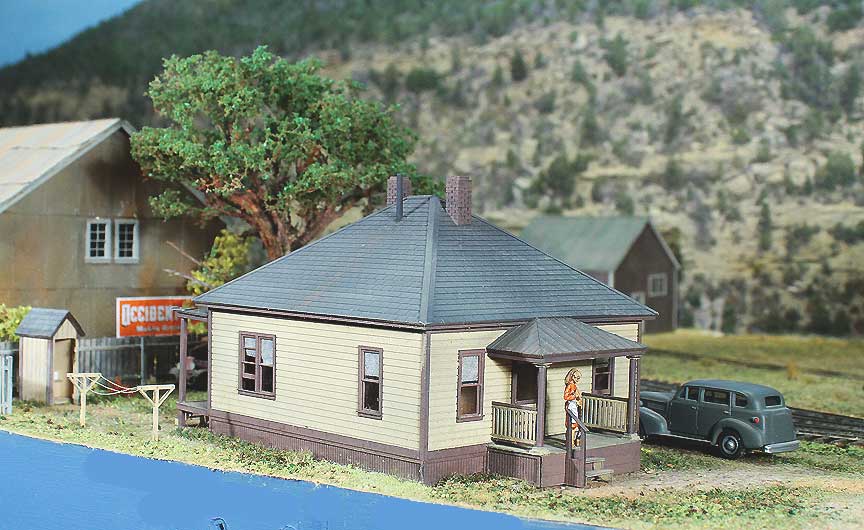
Once again, John Chlebowski did me a wonderful favor and scratch-built the above Animas Forks House. Chick Sweeney made the pickup truck and Lori painted the couple that's glad to see each other. I installed the house just outside of Ridgway.
Here's another scratchbuilding project John did for the layout. It's the Ranch House at Dallas Divide. As you'll see over the next few images, a lot of time was spent developing Dallas Divide over the last two years.

John also assembled the Section House and Bunk House from Banta kits and scratchbuilt the rancher's barn. John also assembled the Dallas Divide coal shed, tool shed, and speeder shed.
Because I needed at least five more stock pens, I developed a "kit" for them. Here's the first one assembled at Dallas Divide. If you've been admiring the Dallas Divide backdrop, it was made by my friend Dale Kreutzer. Dale does beautiful work! Here's a few more images:
This is the wye at Dallas Divide. The end of the tail track is about 1/4-inch from the wall (which is a 90-degree inside corner!).
I thought I might as well finish up Dallas Divide by showing the left side. The liftout section for all the house's mechanical equipment shows in the very lower left corner.
There's still a long way to go before I feel Dallas Divide is finished, but that can be said about the entire layout. None of the structures other than the stock pen and ranch house are permanently in place and should receive a lot of "detail" attention as well as interior lighting. But there are higher priorities for the time being!
Another area that has received attention over the last two years has been the town of McPhee. Lori had been pushing me to "finish a town" and I decided McPhee was a lot more "do-able" than any of the others. Here's a few images:
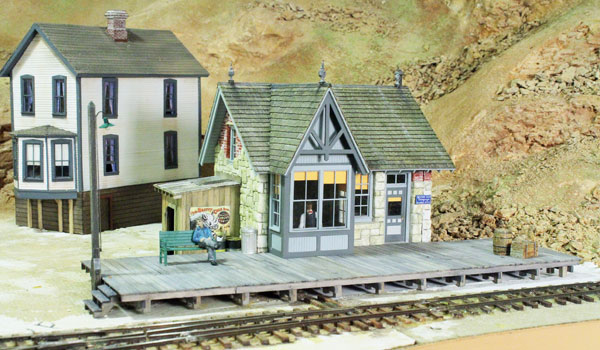
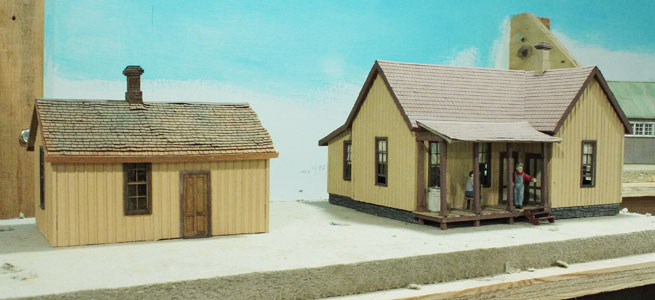
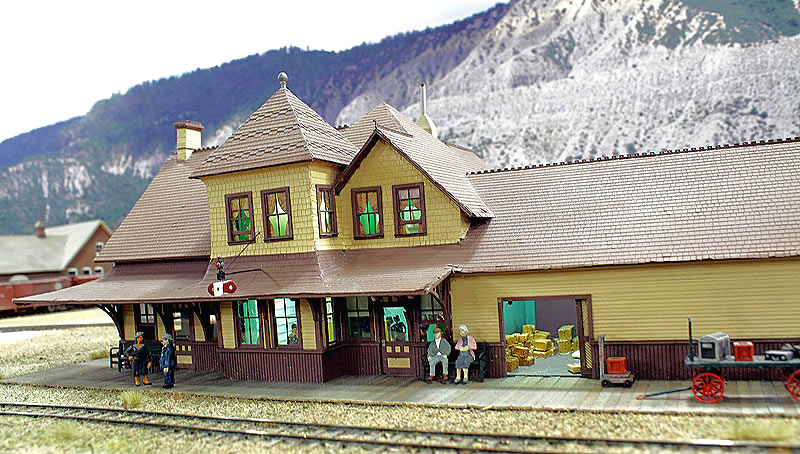
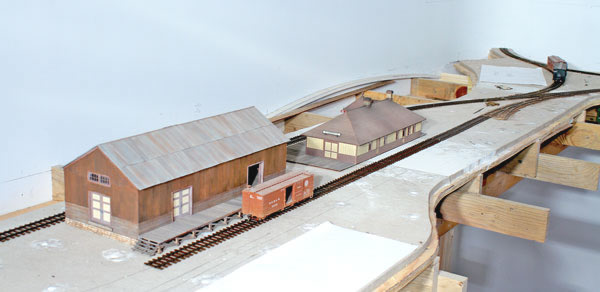
This is my depot at the McPhee as built by my friend Pete Smith. Pete helped develop the depot kit many years ago when he was part of the Building & Structure Company. The outhouse was built by the ever famous John Kalin! Thank you BOTH!
The small house behind the depot with the red door was one I designed as a "company house" to fit the small space. The casket on the platform is a shipment from Muerte's Mortuary (scratchbuilt structure using the laser) located at the end of Main Street. The rest of the town is to the left.
This is the main street in McPhee. Most of these buildings were donated by...guess who?..: John C! I did have to design the last building on the right: Muerte's Mortuary. I'll be renaming Molley's Bar to something like "On The Edge Saloon" -- it's quite a long drop to the floor! The road leading over the hill runs to the (imaginary) lumber camps.
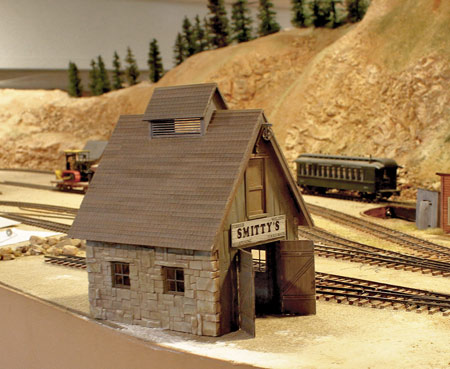
On rare occasions I actually sit down and assemble someone else's kit! I built this blacksmith shop from an old Building & Structure kit. I changed the roof to shake shingles and added the vented clerestory. The building sets across from Molley's Bar in McPhee. It's awaiting further detailing.
In addition to the progress at Dallas Divide and McPhee, the town of Dolores has received a bit of attention, too:
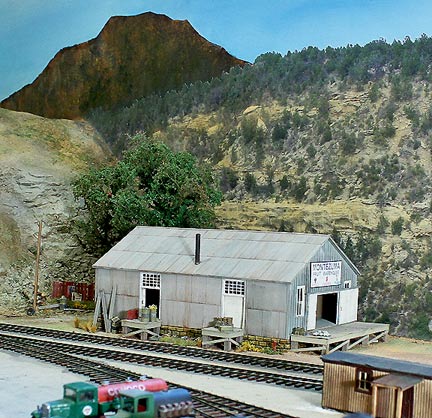
The prototype Montezuma Fruit Company never had a sign as far as I know, but I thought mine deserved one. After being on the railroad for several years, the structure also needed some TLC including replacing the tree behind it. If I ever run out of things to do (HA!), this one may become an S-scale kit someday.
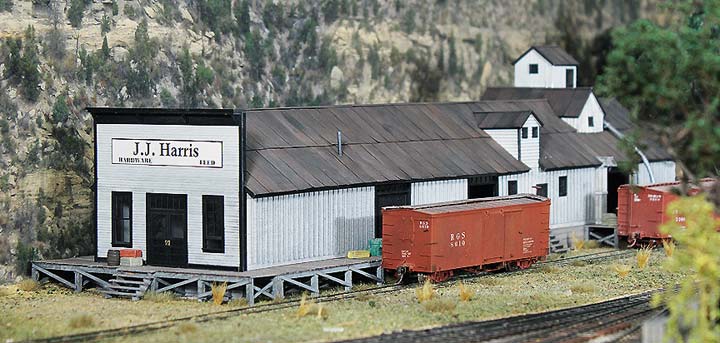
As a lot of you know, we released the JJ Harris kit in both HO and S. Here's the S-scale show model in place in Dolores.
The most recent structure added to Dolores is the RGS Section House, also know as the Sear's Kit House. This is the same model that was used as our show model at many shows and conventions.
Right now I'm assembling the Dolores CONOCO Plant. The components include the four tanks, the pump house, office, garage, and large warehouse. They can be arranged to fit just about any space! (See the completed installation five pictures below.)
There are a couple other areas that received a bit of attention:
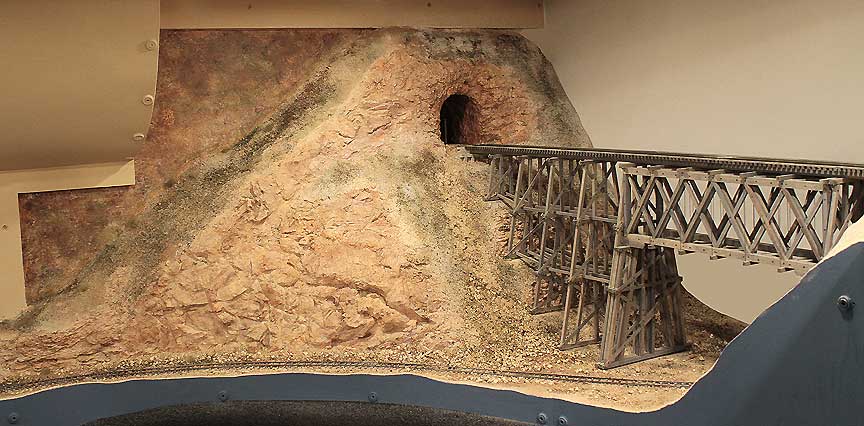
The last update to this page includes a picture of the Furnace Trestle that Bill Scobie built. Here it is again with the hardshell in place and the basic ground cover completed. It's awaiting trees, shrubs, and weeds. (For clarity, I've blocked out the view in the next room behind the trestle of Dallas Divide.)
The first Gallagher Trestle, number 57A, is the latest "expansion" project on the railroad. It was built by John Kalin. The trestle is full-size, approximately 50-inches long, and includes a 2.5% grade and a 90-degree curve on a 32-inch radius. As with the wye at Dallas Divide, that's a 90-degree corner behind it with a curved backdrop. John has also constructed the second Gallagher trestle, #57B, built full-size. It will be added as the next expansion to the left. The Placerville wye is located on the lower level directly below the trestle. The water tank is temporarily in place to show the separation.
Here's another structure that was holding things up. Again, the work of John Chlebowski. John scratchbuilt the Trestle Mill that is shown very near it's final location between Ridgway and Ouray. The track at the right has just come around the corner by the Maude Monroe (Hukill) mine and will now cross a curving trestle in front of the mill. The line then enters Ouray on the lower level below Dallas Divide. Yes, MORE work is waiting for me!
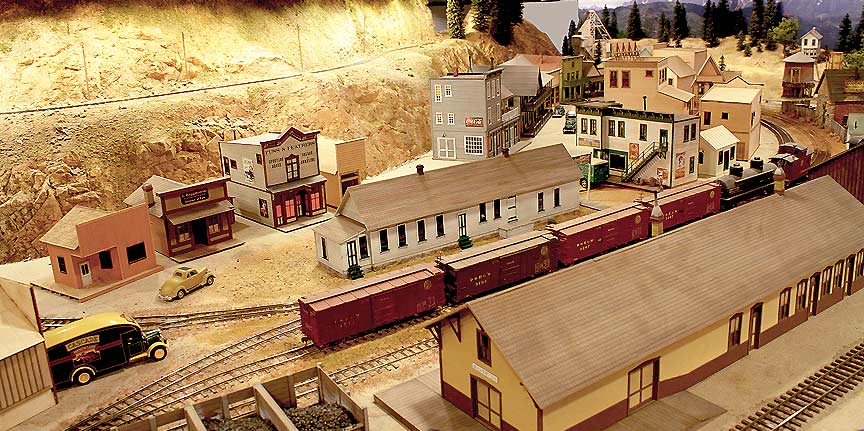
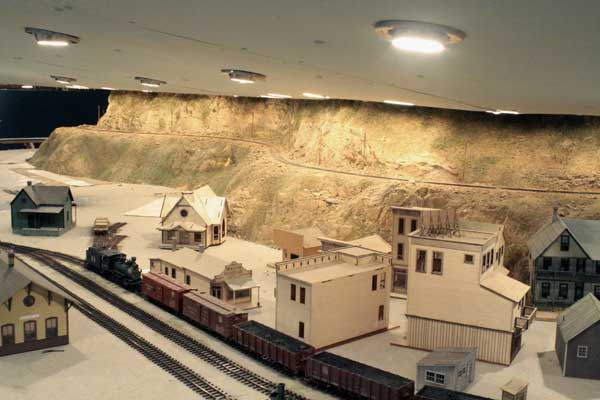
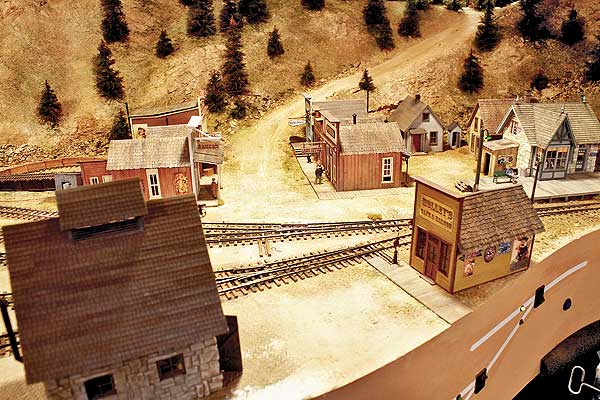
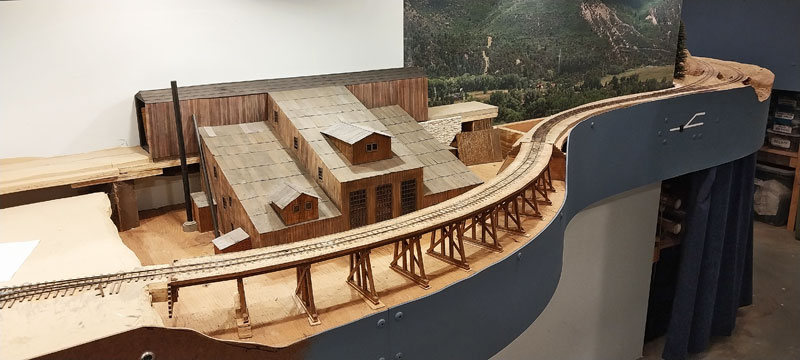
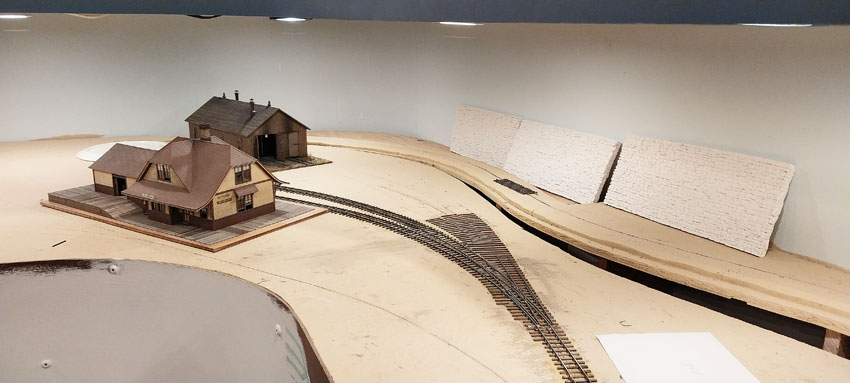
Comparing the photo of Silverton to those in earlier updates, it's easy to see the building population has grown (as well as the road traffic!). A lot of the structures are old "test builds" from previous kits simply filling space to see what looks best where. However, that's the Silverton Northern Depot in the center in it's permanent location.
Yes, it's been nearly 5 years since I've added to this page, and I apologize. Now that I am fully retired from Ragg's...To Riches?, I've been trying to spend as much free time working on building my RGS as possible. Sitting for hours at a computer updating a web page is something I no longer enjoy -- building the railroad is much more rewarding! But it's been too long and I'm feeling guilty. I'll try to figure out and show some of what's been accomplished over the last 5 years!
As you probably know, my RGS railroad is a BIG one. I tend to jump around on projects, moving from one to another in no particular order. Now that I look at the photos from the last few years, I'm surprised by how much was actually accomplished. Based on the above photos posted in my last update, here's a few of the improvements:
Looking at the photos posted years ago, I was just beginning to install my CONOCO facility in Durango. Here is a picture of the final result.
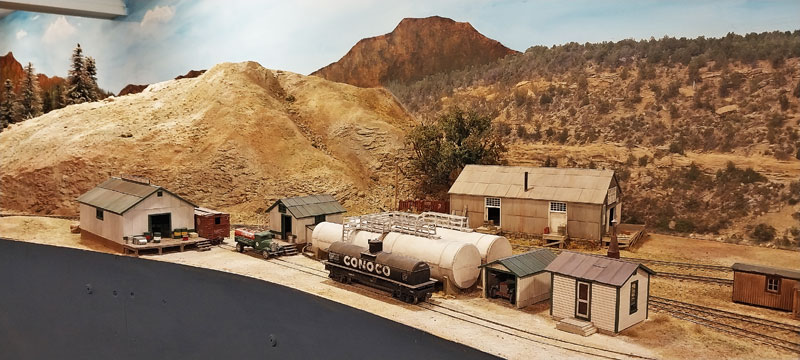
As with nearly all the CONOCO kits that have been built, I, too, had to rearrange the layout of the various structures to fit my space.
Another project mentioned previously was John Chlebowski's Trestle Mill as the trains approached the town of Ouray. John had built the mill for me but it hadn't been installed. Some progress has been made to that end. The "deck" trestle has been built and installed, as well as the roadbed for the track servicing the mill. A deck trestle is one where a solid wood deck is built over the bents and filled with ballast in which the track is laid. This is the only one that I know of that was anywhere near the RGS. It must have been a maintenance headache!
One of the first jobs I had when construction began on my railroad (early 1990s) was to build a "temporary" wall about 20 feet long separating the railroad from the woodshop, dividing the basement approximately in half. Although the wall made Lori happy as it kept me confined to building in the one room, it also required that the railroad be built in several smaller, disconnected "chunks" that would eventually all be joined (provided I lived long enough). When I would talk about expanding, I always got the same response: finish that first room and THEN move on. Hmph! Sadly, it made sense and I rarely complained (at least not so loud that she could hear me). Finally, though, the railroad in that room was nearly complete and I burst out. In 2024 the "temporary" wall that separated the railroad from the workshop for more than 30 years came down. It sure changed the view!
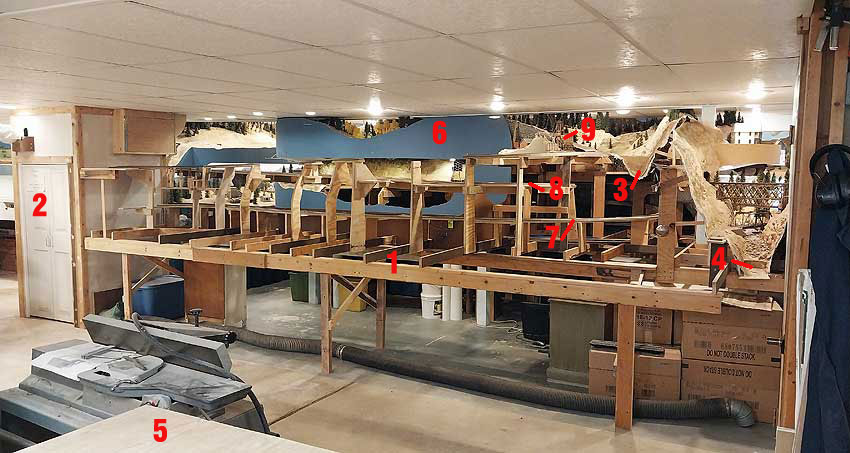
The wall ran from #2, the furnace enclosure, to the entry door that is perpendicular to the far right edge of the photo. You can see some of the workshop equipment, #5, in the foreground. #1 is as far as I could go with the benchwork while the wall was still in place. The future town of Ophir is to the right and above the number 2. #3 is the dam that holds back Trout Lake; #4 is the Animas River on its way from Silverton to Durango; #6 is the fascia with Trout Lake beyond; #7 is the main line running from Dolores headed for Durango; #8 is the main line running from Ridgway to Dallas Divide; and, #9 is Bob Christofferson's mine located where the Matterhorn Mill would be on the prototype. Yes, removing the wall gave me a whole new perspective on the railroad! It has progressed considerably since this photo was taken.
Another project was the Hancock trestle located between Dallas Divide and Placerville. There is a photo (somewhere above) that shows the line prior to the trestle being added. Here is the structure as it appears today:
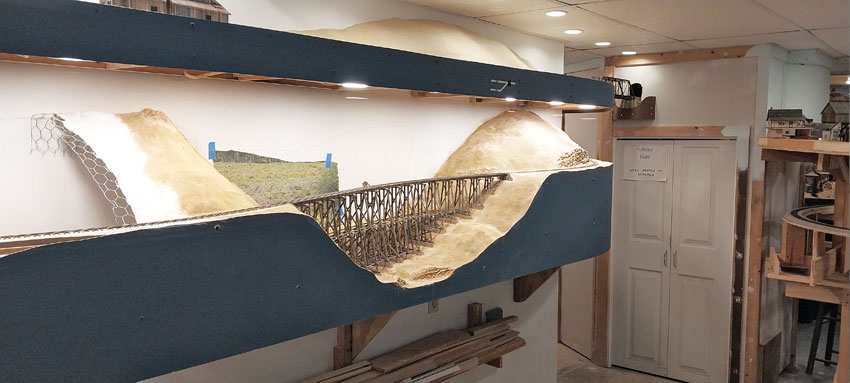
The trestle is built full size and crosses a small stream and roadway, as the prototype did. The small piece of photo backdrop is just a trial run. The bit of structure on the upper level will be a sawmill between Lizard Head and Rico. The very right edge of the photo includes a small bit of Ophir on the top level and a piece of the main line on the lower level running to Durango. Some of the basic scenery has been added to both levels.
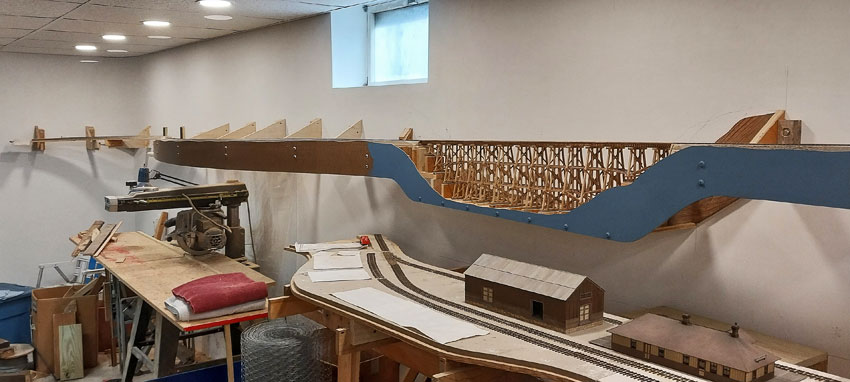
Moving further along the upper level towards Ridgway, the second Gallagher trestle, #57A (full size), has been installed and the track extends to the left where it will enter Rico. On the lower level is the Placerville Depot and warehouse. Also, sadly, more woodshop equipment remains blocking the right of way.
All the while the current projects shown in this update were being built, more sheetrock, ceiling tile, and lighting were being added to extend the railroad's workspace. Very little of the basement is now unfinished and only about 18 feet of benchwork yet to be built that will allow all of the disconnected sections of my RGS to be a complete railroad.
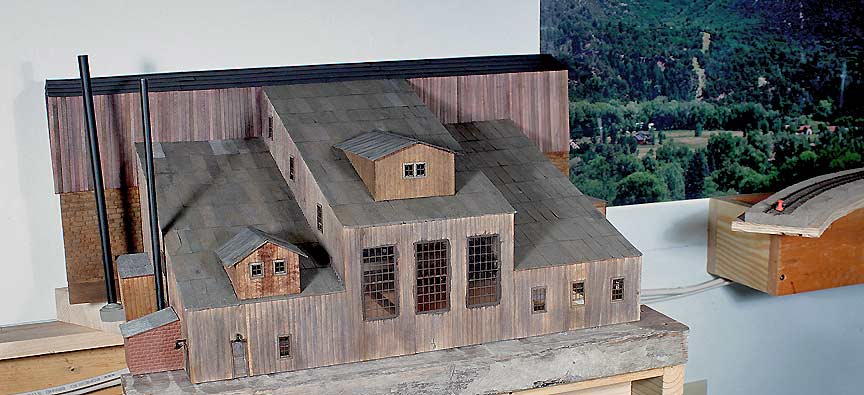
Here is my Ouray as it is today. Once the Mill Trestle was in place, the Homasote was installed in Ouray and the first of three 3-way switches to be located in town was built. It will serve the engine house in the background. I used an Arduino controller to operate the stepper motor via push button positioning located on the fascia. The three positioning adjustment potentiometers are also located on the fascia where they can be easily tweeked when needed. This approach to 3-way switch control is dependable and very affordable (less than $30). Building a 3-way switch and its controller is a big job and takes a lot of patience and time. I can manage maybe one every couple of years!
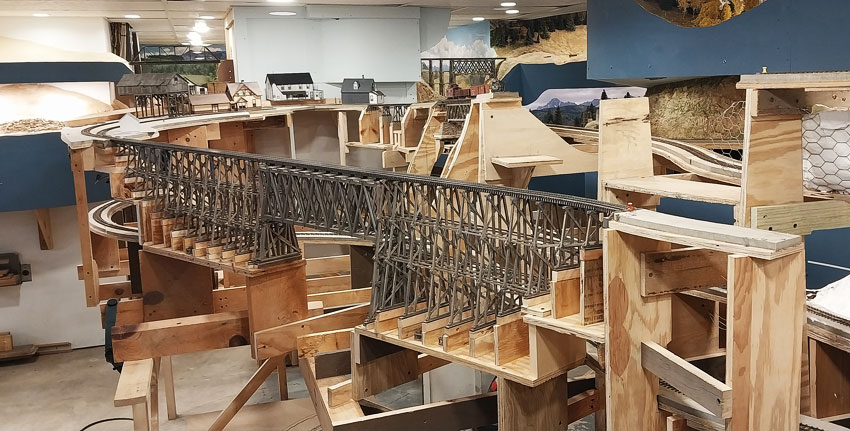
This area (the Ophir Loop) has consumed nearly all my spare time over the last year or so. The Ophir Loop will, as expected, be the scenic highlight of the railroad. First, the benchwork had to be extended (lower left) beyond the confining ("temporary") wall location. Before the wall came down, bridge #45B was built and installed at the far end of the loop. Next, after the wall was removed, came #45A. The bridge is over 7-feet long and is built full-size as it appeared when it was first constructed. I had to locate the slight curve in the the trestle to the opposite end of the prototype's because of space limitations. Bridges #46B and #46C are also now in place.
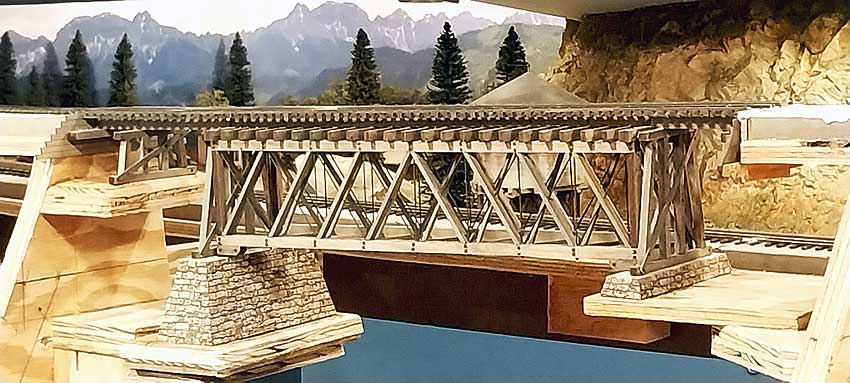
Bridge #46B, full size as originally built. That background makes for a nice photo but won't last. The rock walls of the highline will be built directly behind the bridge and will extend to the ceiling. Bridge #46C is nearly identical to #46B and is located just a foot to the right. All that remains to be built is bridge #46F for my highline. Sadly, there just isn't enough room to build all the prototype's highline bridges.
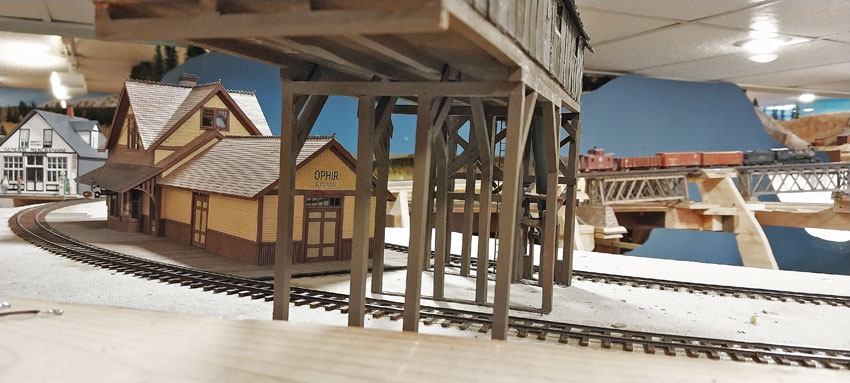
The building of the Ophir Depot is the most recent completed project. I had purchased a commercial kit back in the 1990s but decided to design and build one that more closely adhered to the prototype's. Note the short freight train crossing bridges #46B and #46C on its way up the highline in the background. Again, a rock wall will separate the scene from what is seen in the far background.
That's about it for now. The next couple of years will see some major projects undertaken that will finally allow the joining of all the disconnected sections that now exist.
Hope you enjoyed the update!
'TILL NEXT TIME! (if there IS a next time!)